I recently added some SATA drives to my Linux Mint 17 system and ran into a few glitches and issues. This is a YouTube video that shows how to get around these issues using a USB Drive rather than a SATA drive, but the principles are the same.
Now that I have your attention, I’d like to describe what I have found out recently about capturing, editing and burning DVDs of videos using Linux. I have been editing video and burning DVDs for years on Windows. I started long ago when the tools were barely functional and finding a set of tools that understood a common set of file formats was quite a challenge. The situation on Windows has matured over the years and currently you can purchase for a very small price a set of tools that will allow you to capture, edit and burn both DVDs and BluRay disks with remarkable ease.
The situation on Linux Mint is almost that good. Currently I cannot find software that allows editing and burning the BluRay disk media with titles and menus, but one certainly can edit the videos themselves. Read on for the full story.
Hurray! Windows File Sharing just works in Linux Mint 17!
It’s been a long time since I tried it. Back in 2010 when I was using Ubuntu, I wrote a post about how to set up Samba, and WinBind to get network sharing going and was quite disappointed that it wasn’t working. Well, that process was so cumbersome that I haven’t used it much over the years and in spite of the fact that about half of my computers are Linux, I haven’t bothered to set it up, or check to see how things have progressed. But I was sharing files recently and lo and behold, it works just fine!
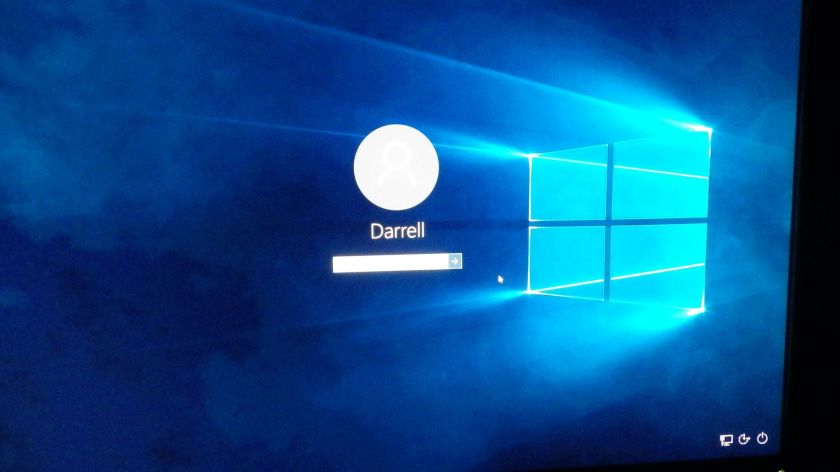
As you can see from this picture, I am looking into a share from a Linux Mint 17 system into a Windows 10 system and can see and read those files. The Windows 10 system drives are shared read/only, as is the best practice. More about that later. But here is what you can expect if you have a mixed network, and how you can use Windows File sharing between Windows 10 and Linux Mint 17.
Wow has a macro facility that allows you to conveniently repeat actions by pressing a button. Essentially a macro types whatever you like into chat as if you had typed it. There are a slew of macro commands, and you can find a tutorial here. But we are going to talk about a special use that we use to move a list of item codes into a macro to save a lot of typing and maybe some typos.
We have kept track of item codes for high level gear so that we can quickly outfit our toons. But we are typing these commands in each time we need new gear. Macros can save a lot of typing.
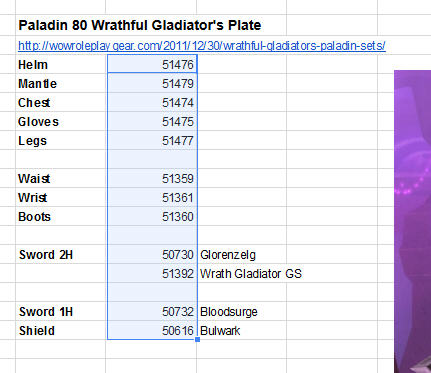
First, open the the Google sheet with the item codes that you need. Here we are going to use Paladin level 80 gear.
Paladin 80 Gear
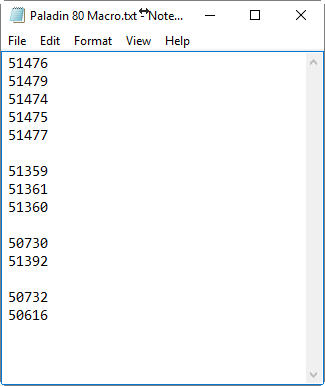
Now select just the numbers in a vertical column. You can select armor and weapons and possibly the accessories too, but there is a limit of 255 characters in a Wow Macro, and armor and accessories comes pretty close to the maximum.
Now create a txt file using notepad, on the desktop and paste the text into the text file. If you use a smarter editor, you may not get what you want. You just want text and line breaks.
Just the item codes in Notepad
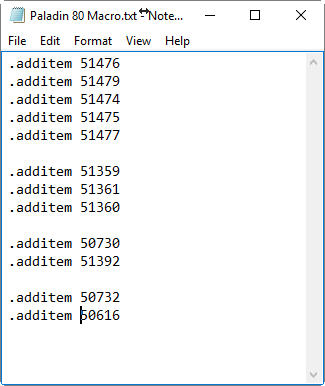
Now type .additem<space> in front of the first item and then select, copy and paste it in front of all the lines.
The macro lines
So now we have our macro. These are the commands we type to create the gear.
Now let’s create the macro.
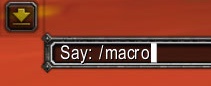
ESC and then choose MacrosType slash macro in the chat window
Or you can type /macro into the chat window to bring up the Macro window.
Macro Window
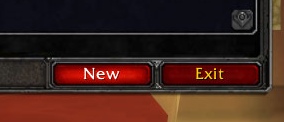
Notice that General Macros is selected. You can have macros for the whole account or just the one character.
Click New.
And then fill out the box with a name and Icon for your macro.
Enter a name and icon
I chose an icon that suggests a Paladin class and included the level of the gear that it would create.
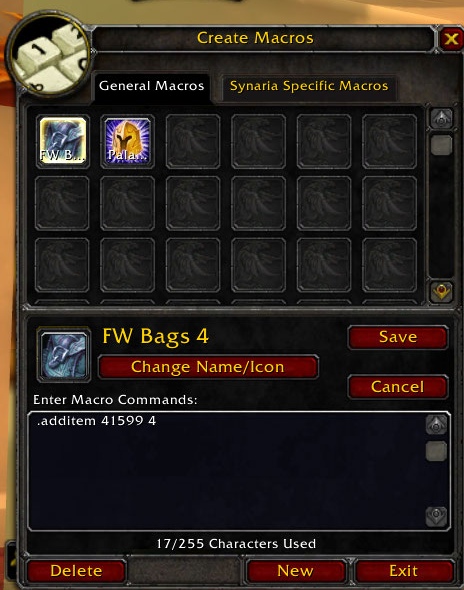
Now use ALT Tab to get back to notepad, select all the text and Ctrl/ C to copy it. Then return to the macro window and use Ctrl/ V to paste the text into the macro commands box.
Completed macro
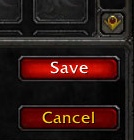
Now click Save.
Now you can drag the icon to an out of the way slot on your spell bar.
Row 3 of the spell bar
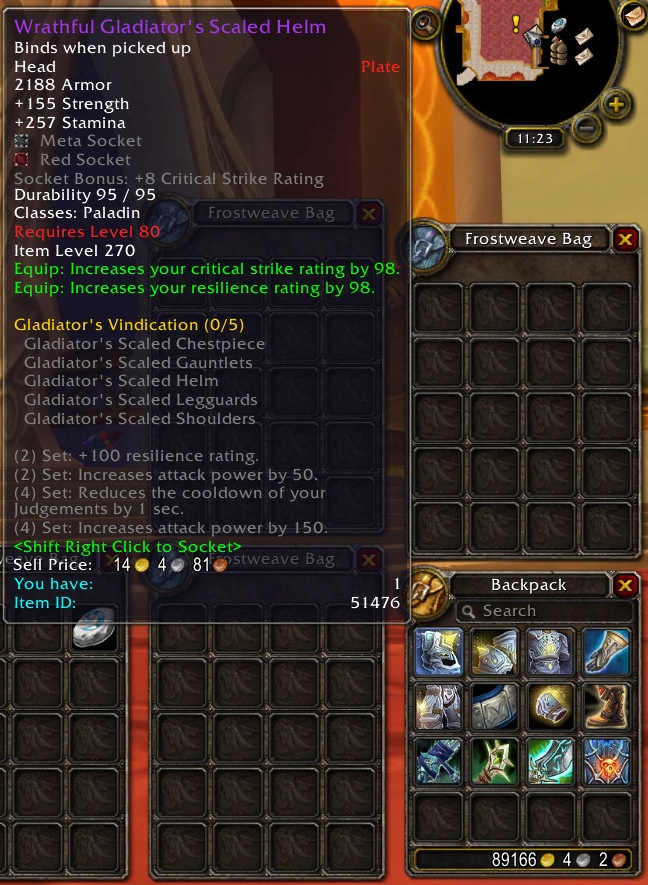
Make sure you have enough space in your bags and then to create all the gear just click on the icon on the spell bar. ONCE ; )
New Gear Created
Another useful macro is one to create some Frostweave Bags, for your bags or bank slots. It is quite a chore to scroll through the icons to find the right one. But it’s there.
I use the Qt Framework to develop portable software for Windows and Linux. You can find my software on sourceforge. This post is going to record the installation instructions for Linux and Windows.
Linux Mint 17
I use Linux Mint 17 at this point and the installation differs slightly from the installation that I found on the net. See below.
Windows 7
Primary development of my software is done on Windows 7 and then the sources are moved to Linux to be compiled there.
Check the rest of this post for installation instructions:
I have a couple of hard drives. But I can’t get them to AutoMount. Used the post here to try to get it to work, but this does not work. The boot stops with a message to “Type S to skip mounting or M to Manually whatever”.
Mount Options
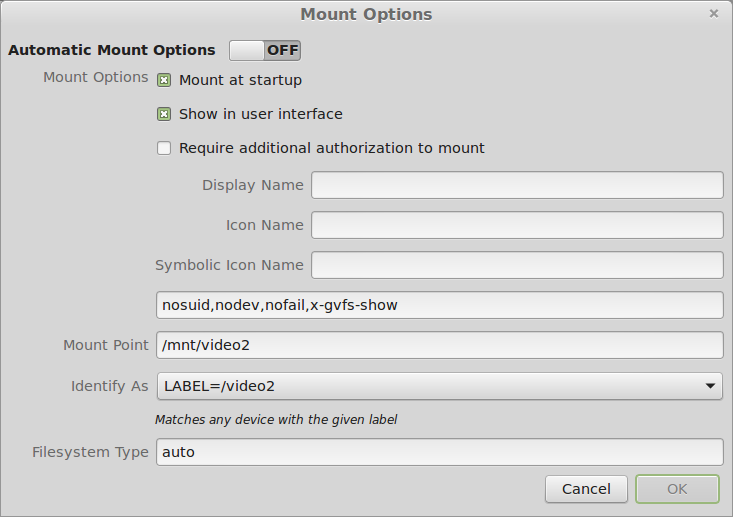
I set the options to LABEL= to match the old mount point, I hoped.
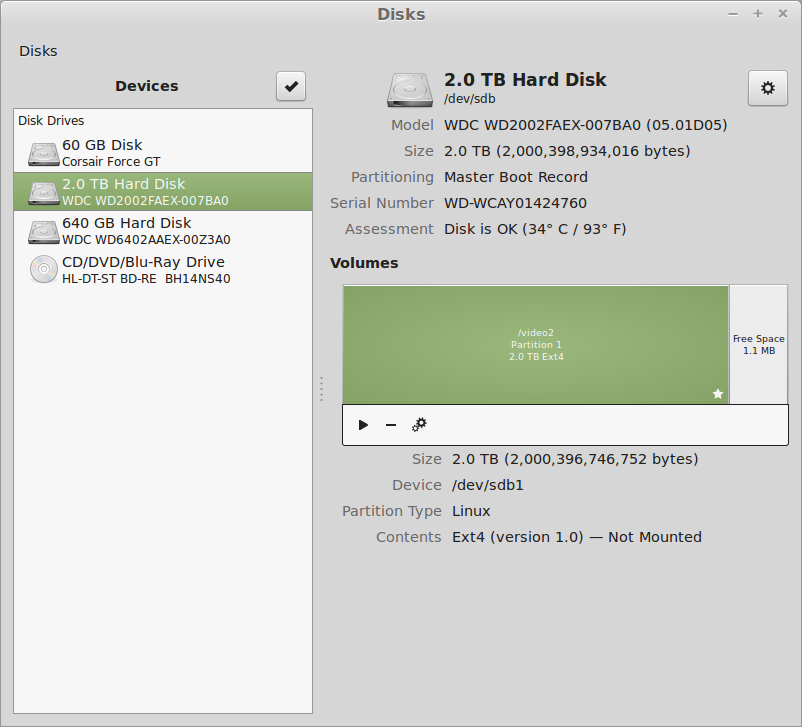
I can mount the drives manually using the little Arrow in the Disks program next to the partition.
PROBLEM SOLVED
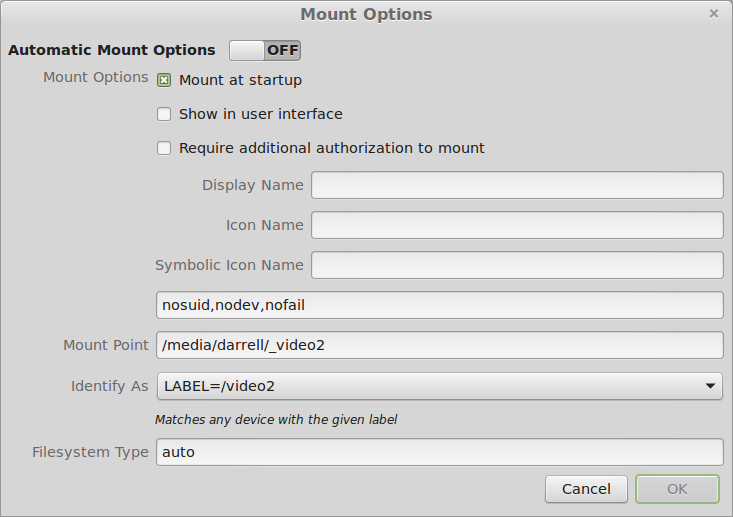
According to this post under Ubuntu: You must uncheck the “Show In User Interface” option:
Correct Options
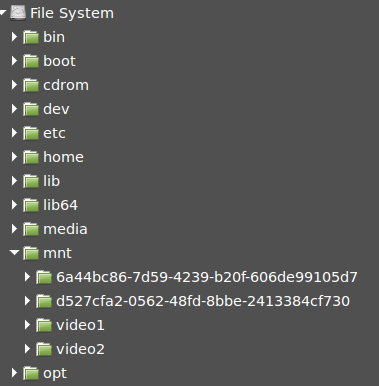
The drive[s] then show up as /mnt/YOURLABELHERE and rebooting remounts the drives properly.
Mounted drives
But these are not the original mount points that were present when the disks were first added to the system. So I changed them and they still mount properly.
Corrected Mount PointsBack to the Original Places
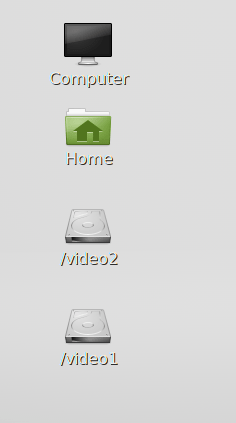
And they appear in the user interface, as you can see. Voila! Why is this so complicated?
ww
BTW, this was published for 2014 so that it does not appear on my first page of the blog. There is no other way I know to get things off the first page.
The primary requirement I had for the purchase of the Sony Nex6 was that it shoot raw to allow processing of the photos to bring out shadows and compress highlight areas in the same photo. HDR – High Dynamic Range – combines photos taken at different exposures to provide the ability to represent both very light and very dark areas in the same JPG image. Raw saves the wider dynamic range data from the sensor to accomplish the same thing. Which is better?
I shot a series of bracketed images in both JPG and Raw and processed them with HDR software and RawTherapee to find out which is better. Beware of clicking on these images. They are the full size images from the camera and can take a while to download.
The photo above was built from JPG bracketed images using Fusion 1 SUM. It shows a typical flatness and lack of saturation of some HDR photos. I was able to get much better results using PictureNaut.
When you are working on a new set of images you need to figure out which ones to use and which ones to toss. This is based on a few things of course, and many of the reasons are easily seen by looking at the image by itself, or comparing the image with the FilmStrip above. It’s almost never enough to just look at the File Browser thumbnail array to cull images.
If you are like me, you often take a few shots from a single spot of a scene. You vary crop, zoom, and exposure, and maybe other settings or just take a couple because the camera may have moved slightly and blurred the shot. So when you get home and start to process these images there are a few to choose from.
At this point, RawTherapee has no easy way to compare images. The current modes are Single Editor and Multiple Editor. Neither of these accomplishes what I need.


 When you are working on a new set of images you need to figure out which ones to use and which ones to toss. This is based on a few things of course, and many of the reasons are easily seen by looking at the image by itself, or comparing the image with the FilmStrip above. It’s almost never enough to just look at the File Browser thumbnail array to cull images.