The pointed nozzle needs a longer dowel. I thought about painting the cord winder black, but it’s not really the time of year to paint things. Too cold in the shop and I don’t want to spray items in the house. So maybe another time. I made an extra cord winder for a friend. Merry Christmas.
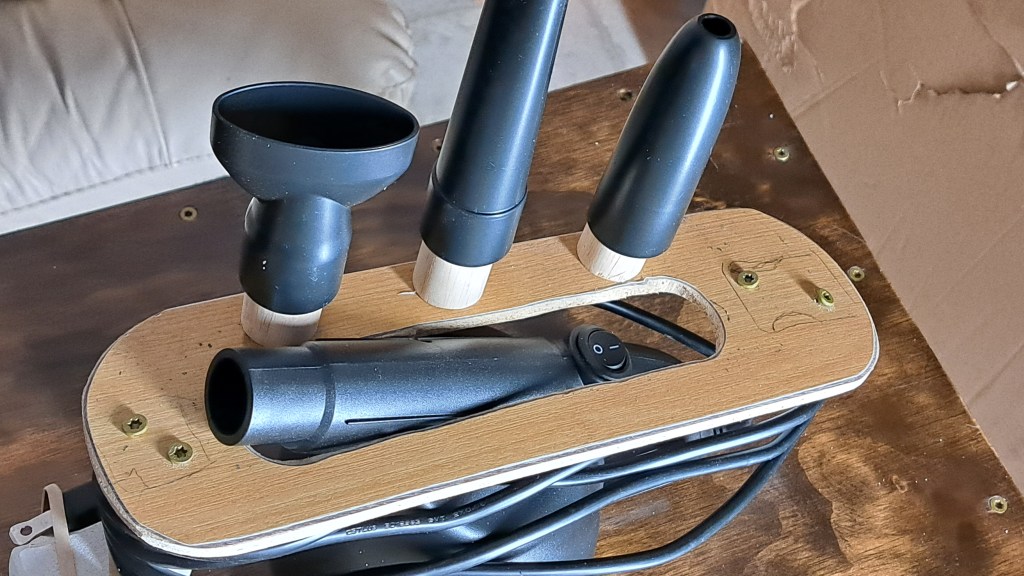
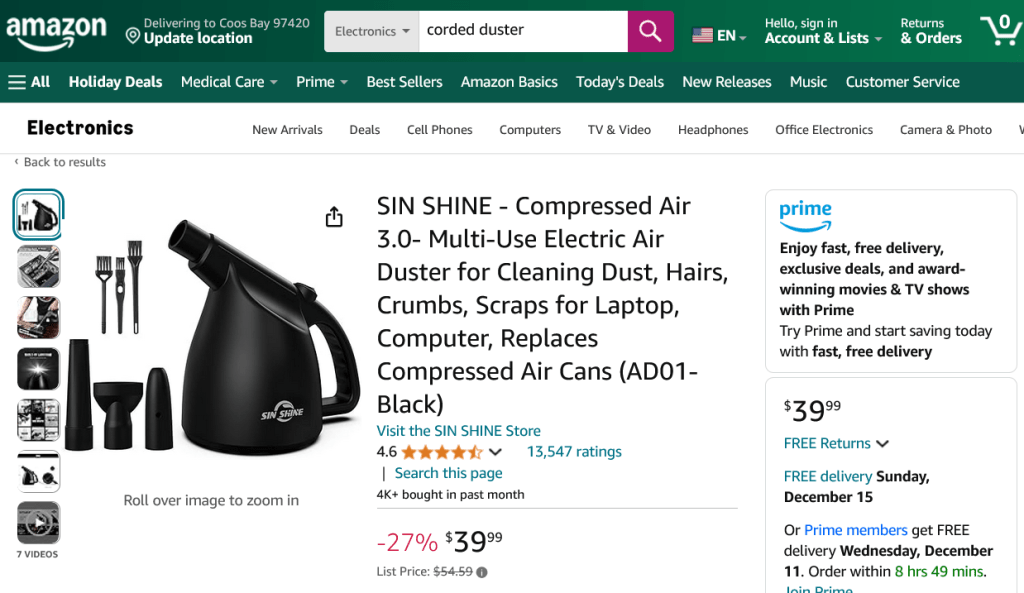
I recently discovered that Dusters are a thing. I had been using a small, clean shop vacuum to blow out my computers. Of course, you can never use the shop vac on vacuum or the hose and inside of the shop vac are dirty and this blows dirt into your computer. Compressed Air cans work, but are expensive. You probably don’t want to use an air compressor since it has so much power that it could damage the electronics and might blow chips or oil or some bad items into your computer. But in the last couple of years, at least since the last time I looked, there are now many types of Dusters out there. This one is corded, to avoid batteries going bad and to have much more power. Also it has a light in the nozzle to light the area where you are cleaning.
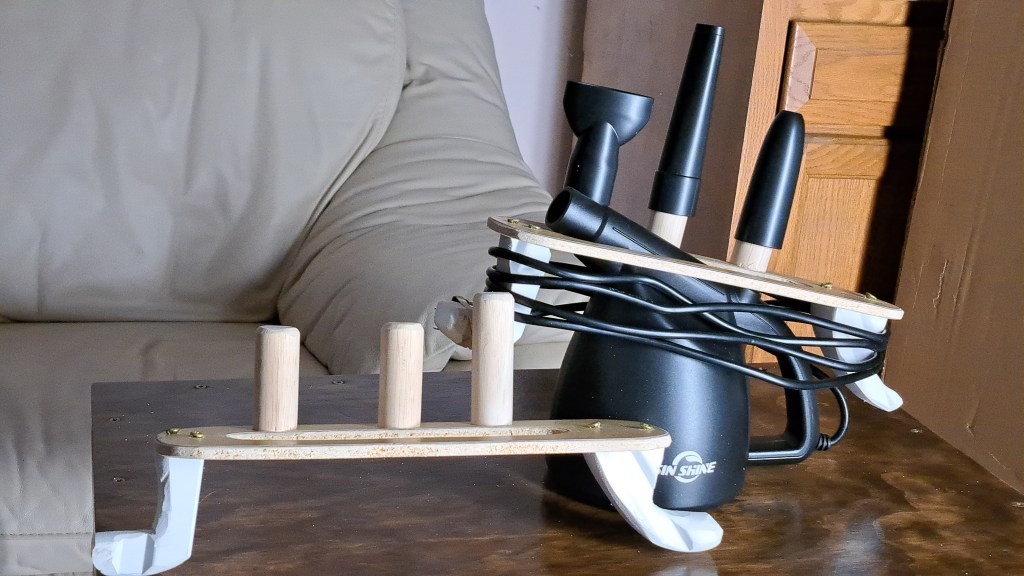
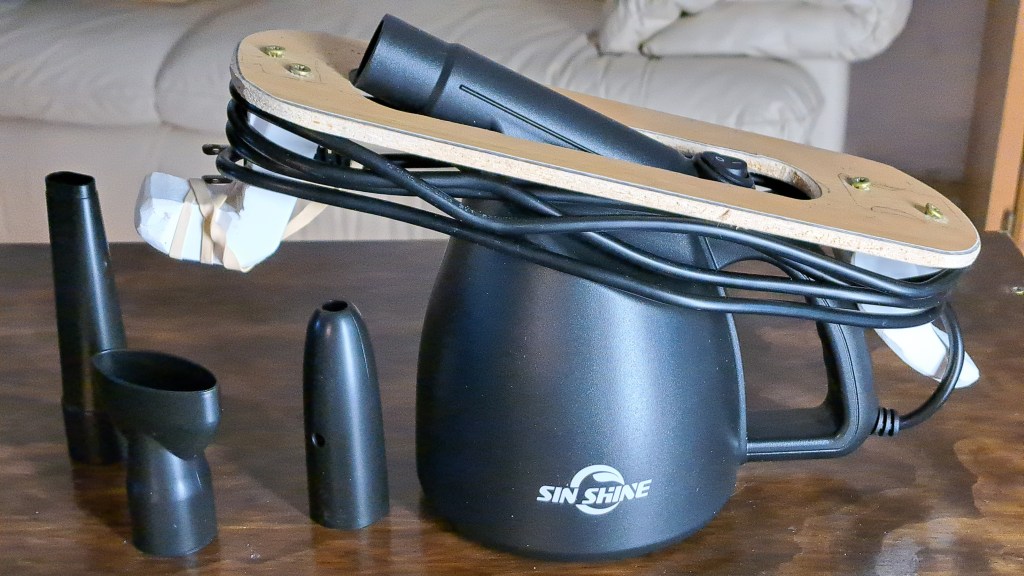
There are many to choose from. This one has a 10 ft cord, which is nice, until you want to put it away.
I spent a while this afternoon making a rack to wind the cord around that fits onto the duster so it can be put away neatly.
An oval cut from a plank of laminate flooring, and a couple of hooks cut from plastic window trim and the cord can be neatly wound for storage. I’ll probably add some dowel stubs to hold the accessories.
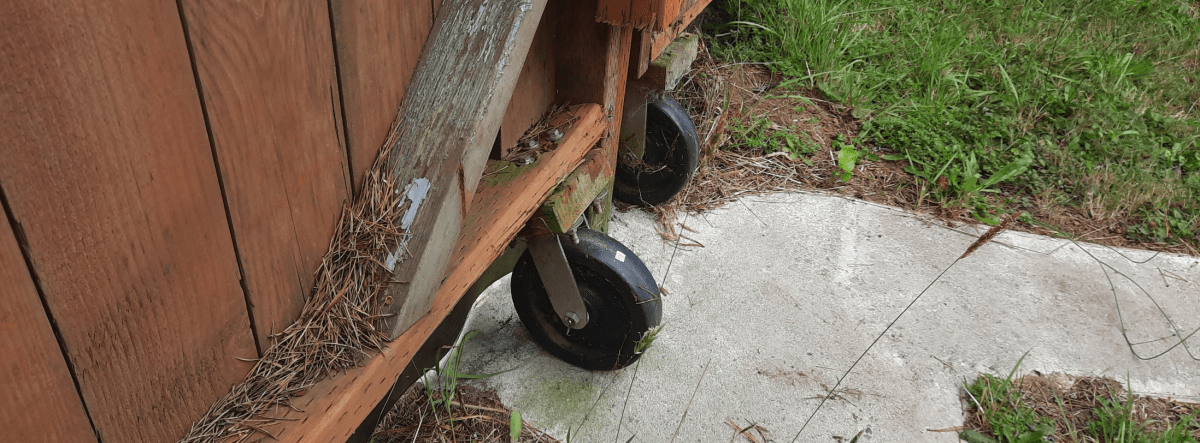
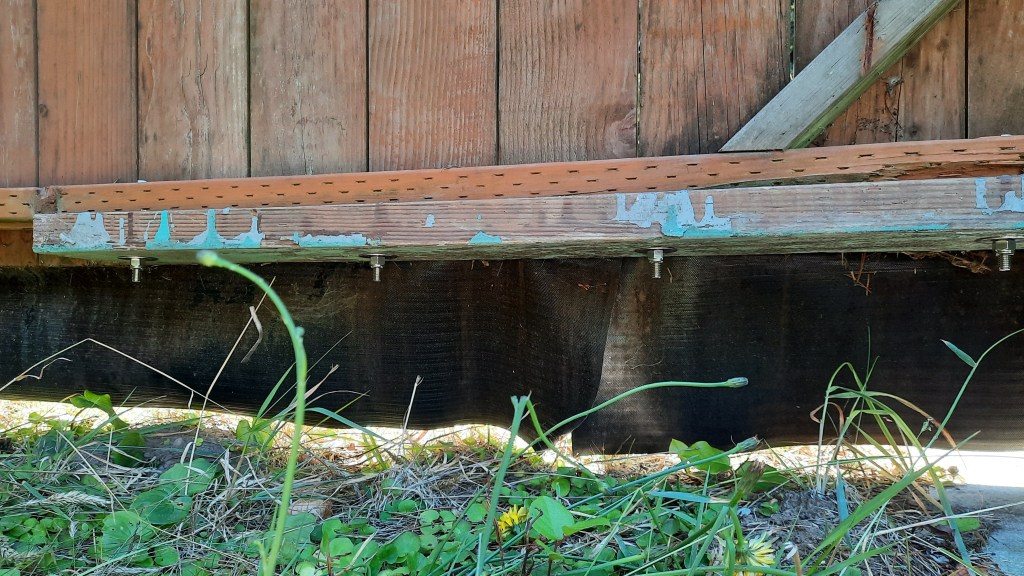
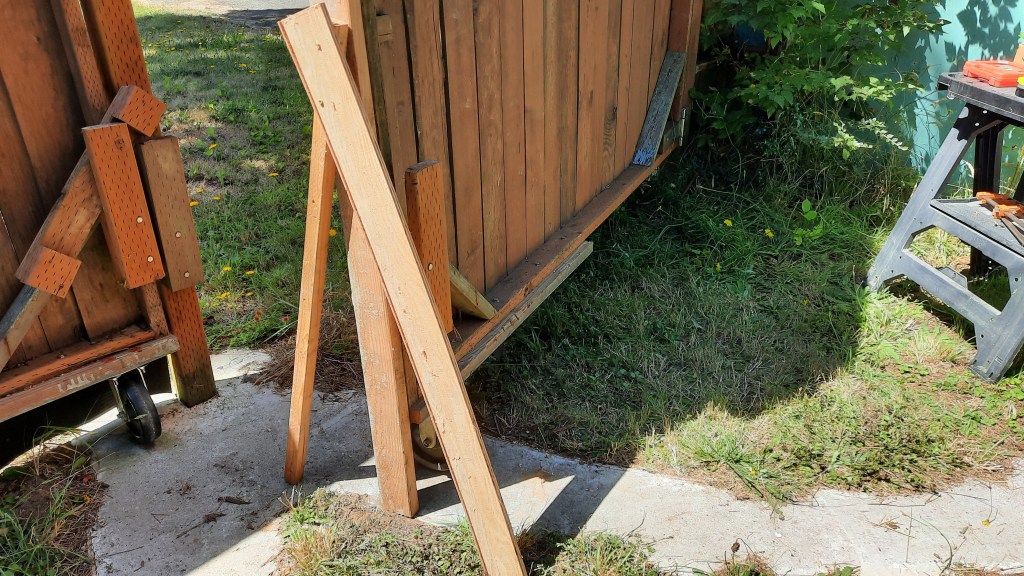
I finally started the repair of the RV Gate Casters.
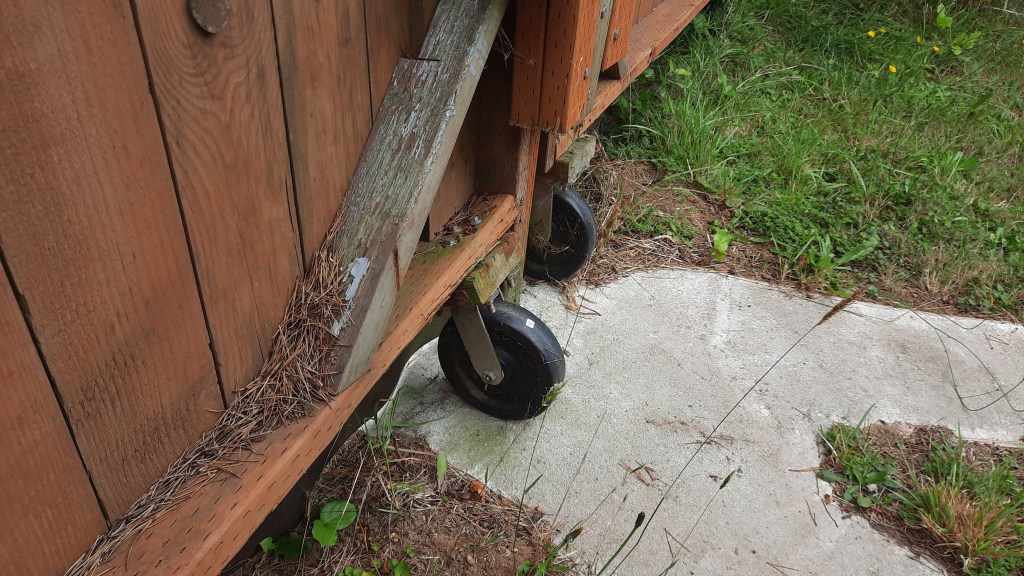
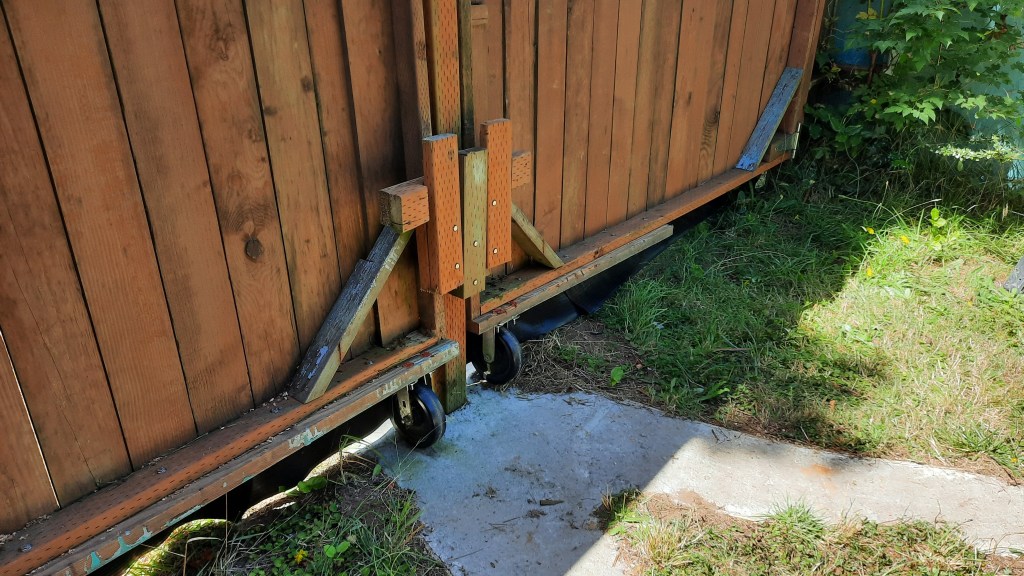
The left side caster is tilted and looks like it will break off soon. As you can see the casters are held on with short pieces of 2 by 6 which are then screwed with lag screws into the bottom 2 by 4 of the gate. On the left side the 2 by 4 is twisting under the load of the caster.
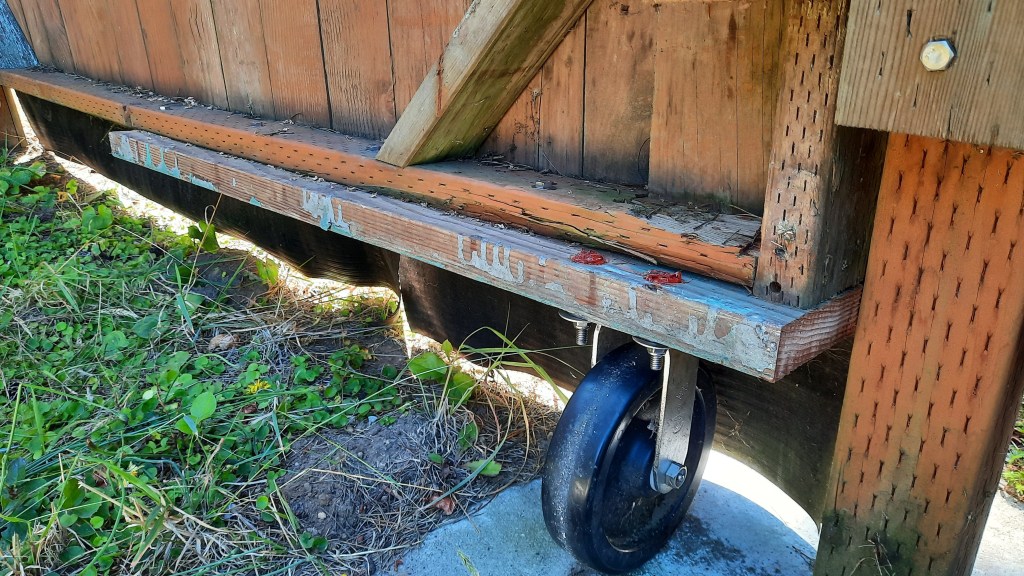
The fix I’ll try is to use a long 2×6 rather than a short piece and extend the 2×6 under the the vertical piece at the center to prevent twisting. I’ll bolt the long 2×6 to the 2×4 so their held tightly together to stiffen them. I had some used treated 2 by 6 left over from tearing off a partially rotted deck.
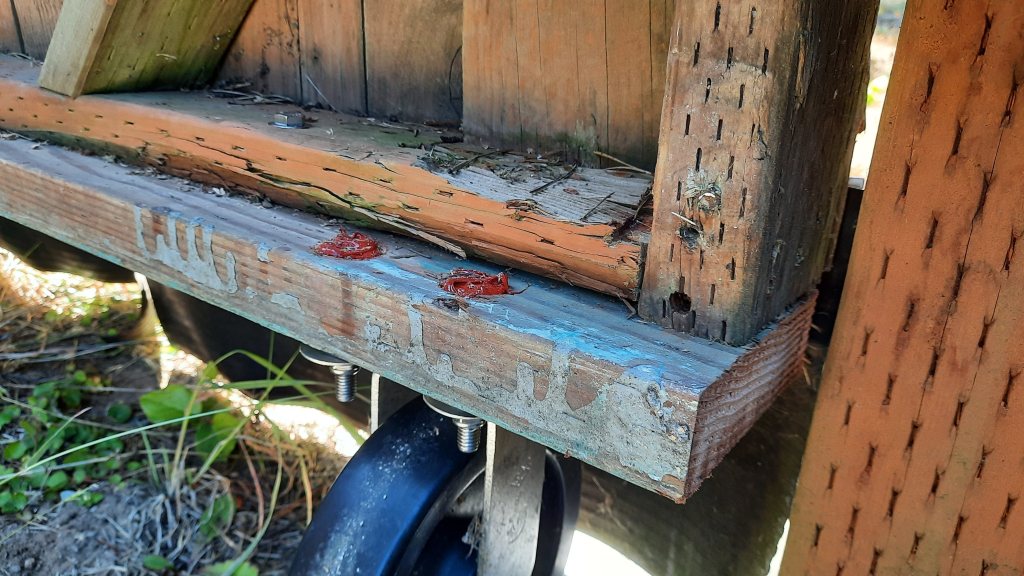
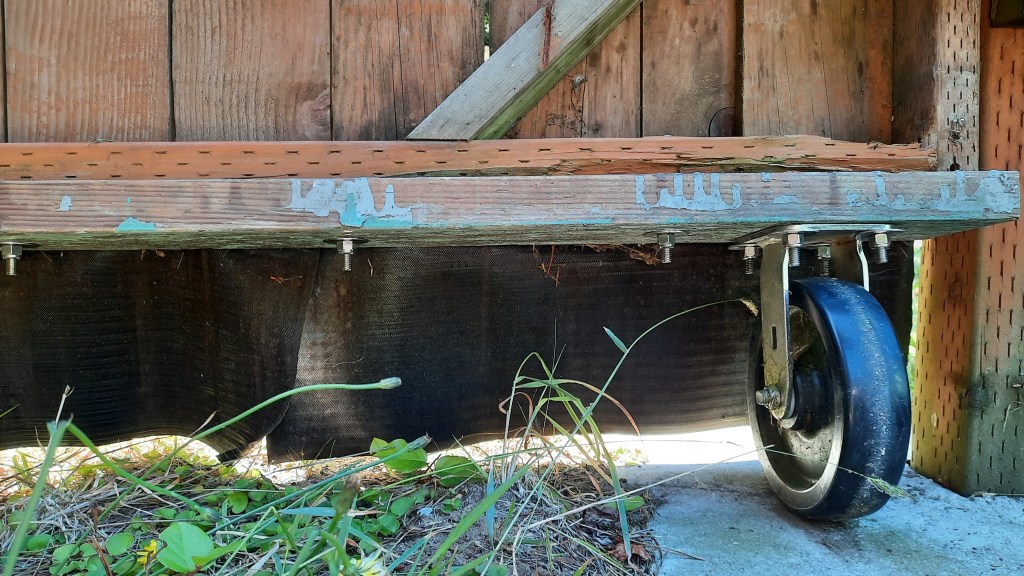
The hardware is all stainless since I live on the coast of Oregon. Also the 3/8″ bolt heads holding the casters on are recessed and covered with silicon to slow down the rot of the 2 x 6 since the recess goes through the treatment.
The bolts all have small washers under the heads and large washers under the nylon lock nuts. Looks like that is working. The caster is held straight under the weight of the gate. No twist. I’ll fix the right side another day.
Cheers, :ww
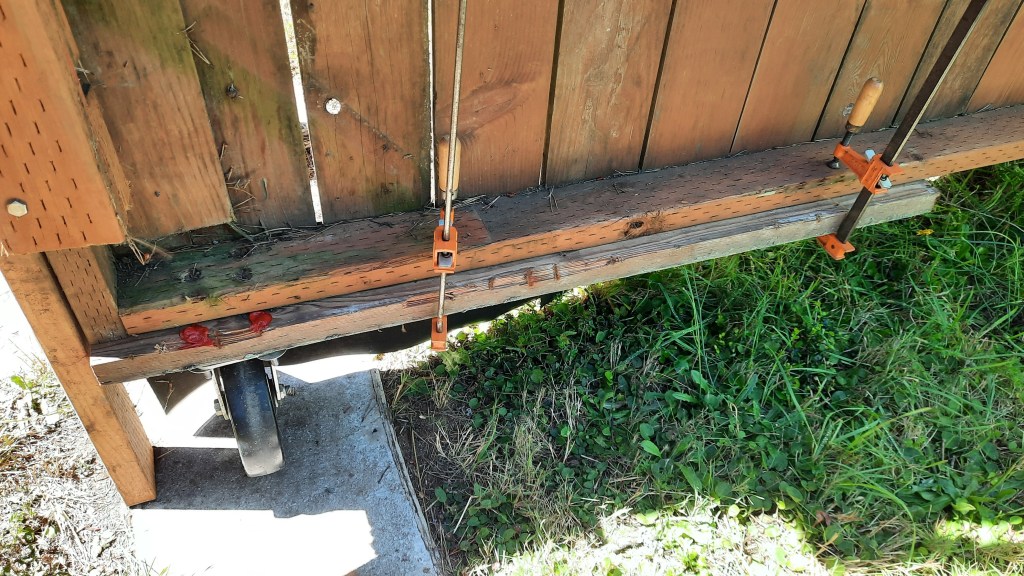
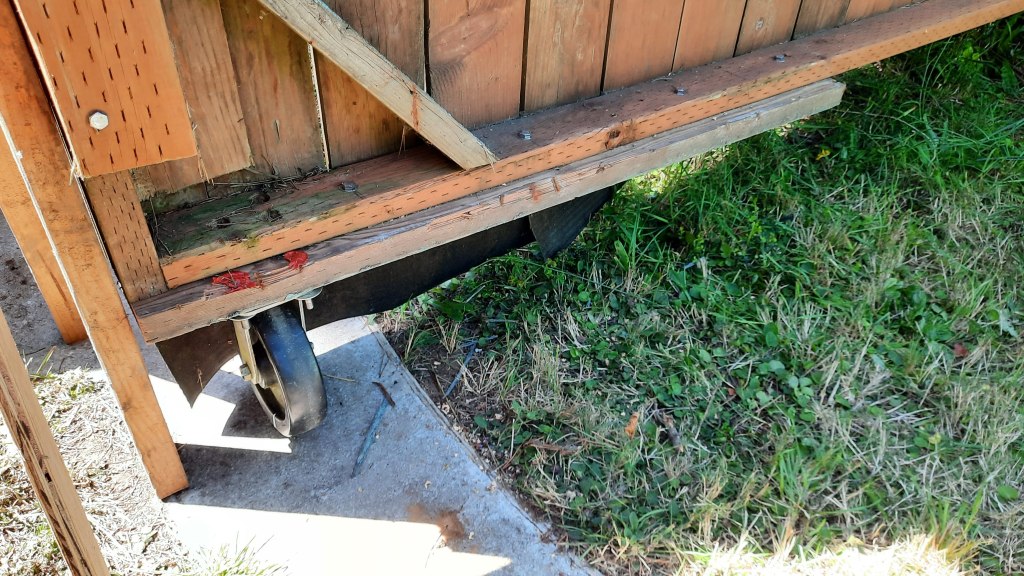
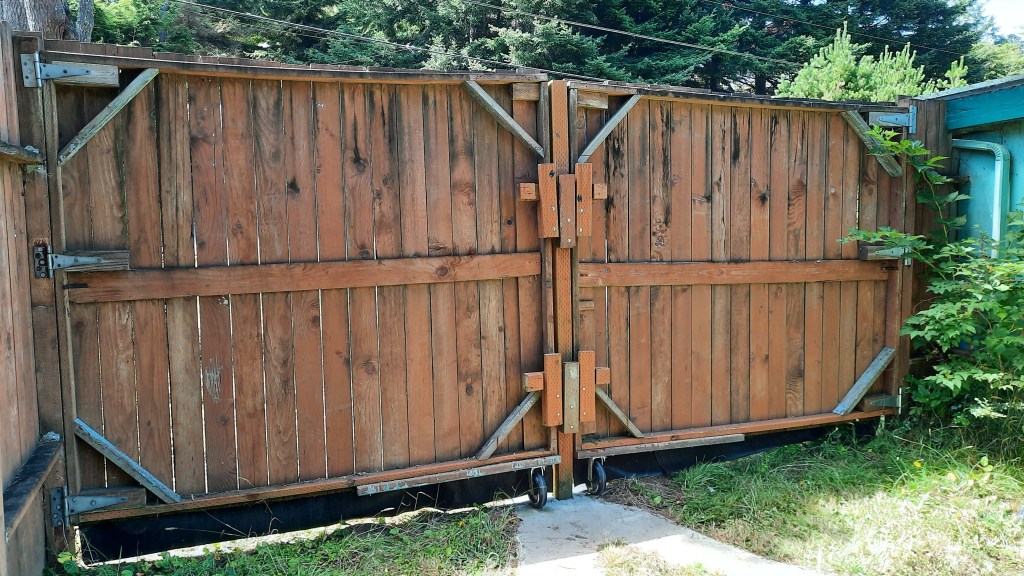
Update – Fix the other side of the gate
I finished the gate repair. Here are pictures of the process.
None of this is a problem for those of you with someone else in the house. Just make a mobile phone call and have the other person stand near the circuit you are testing. Sure Sure. But I live alone.
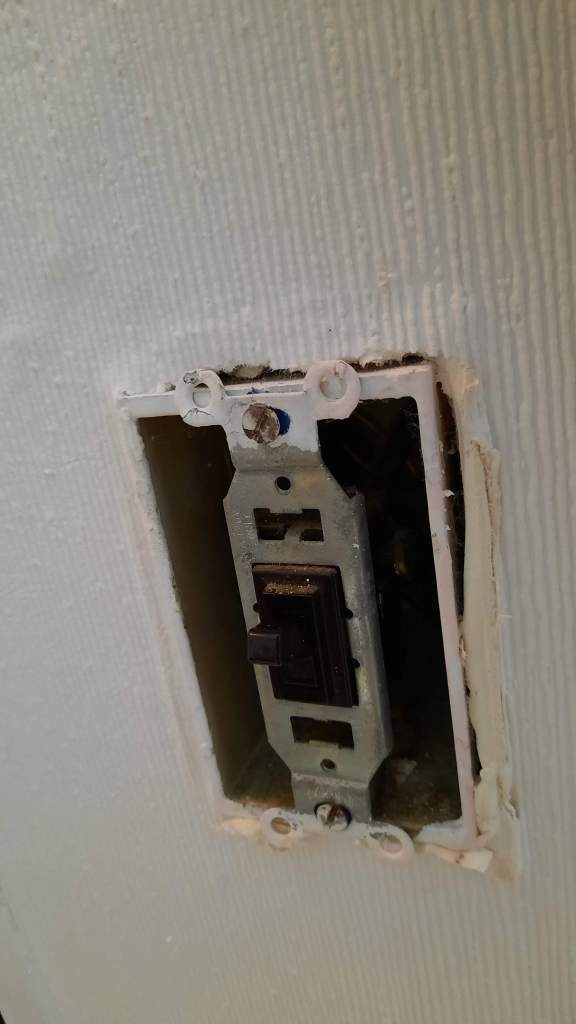
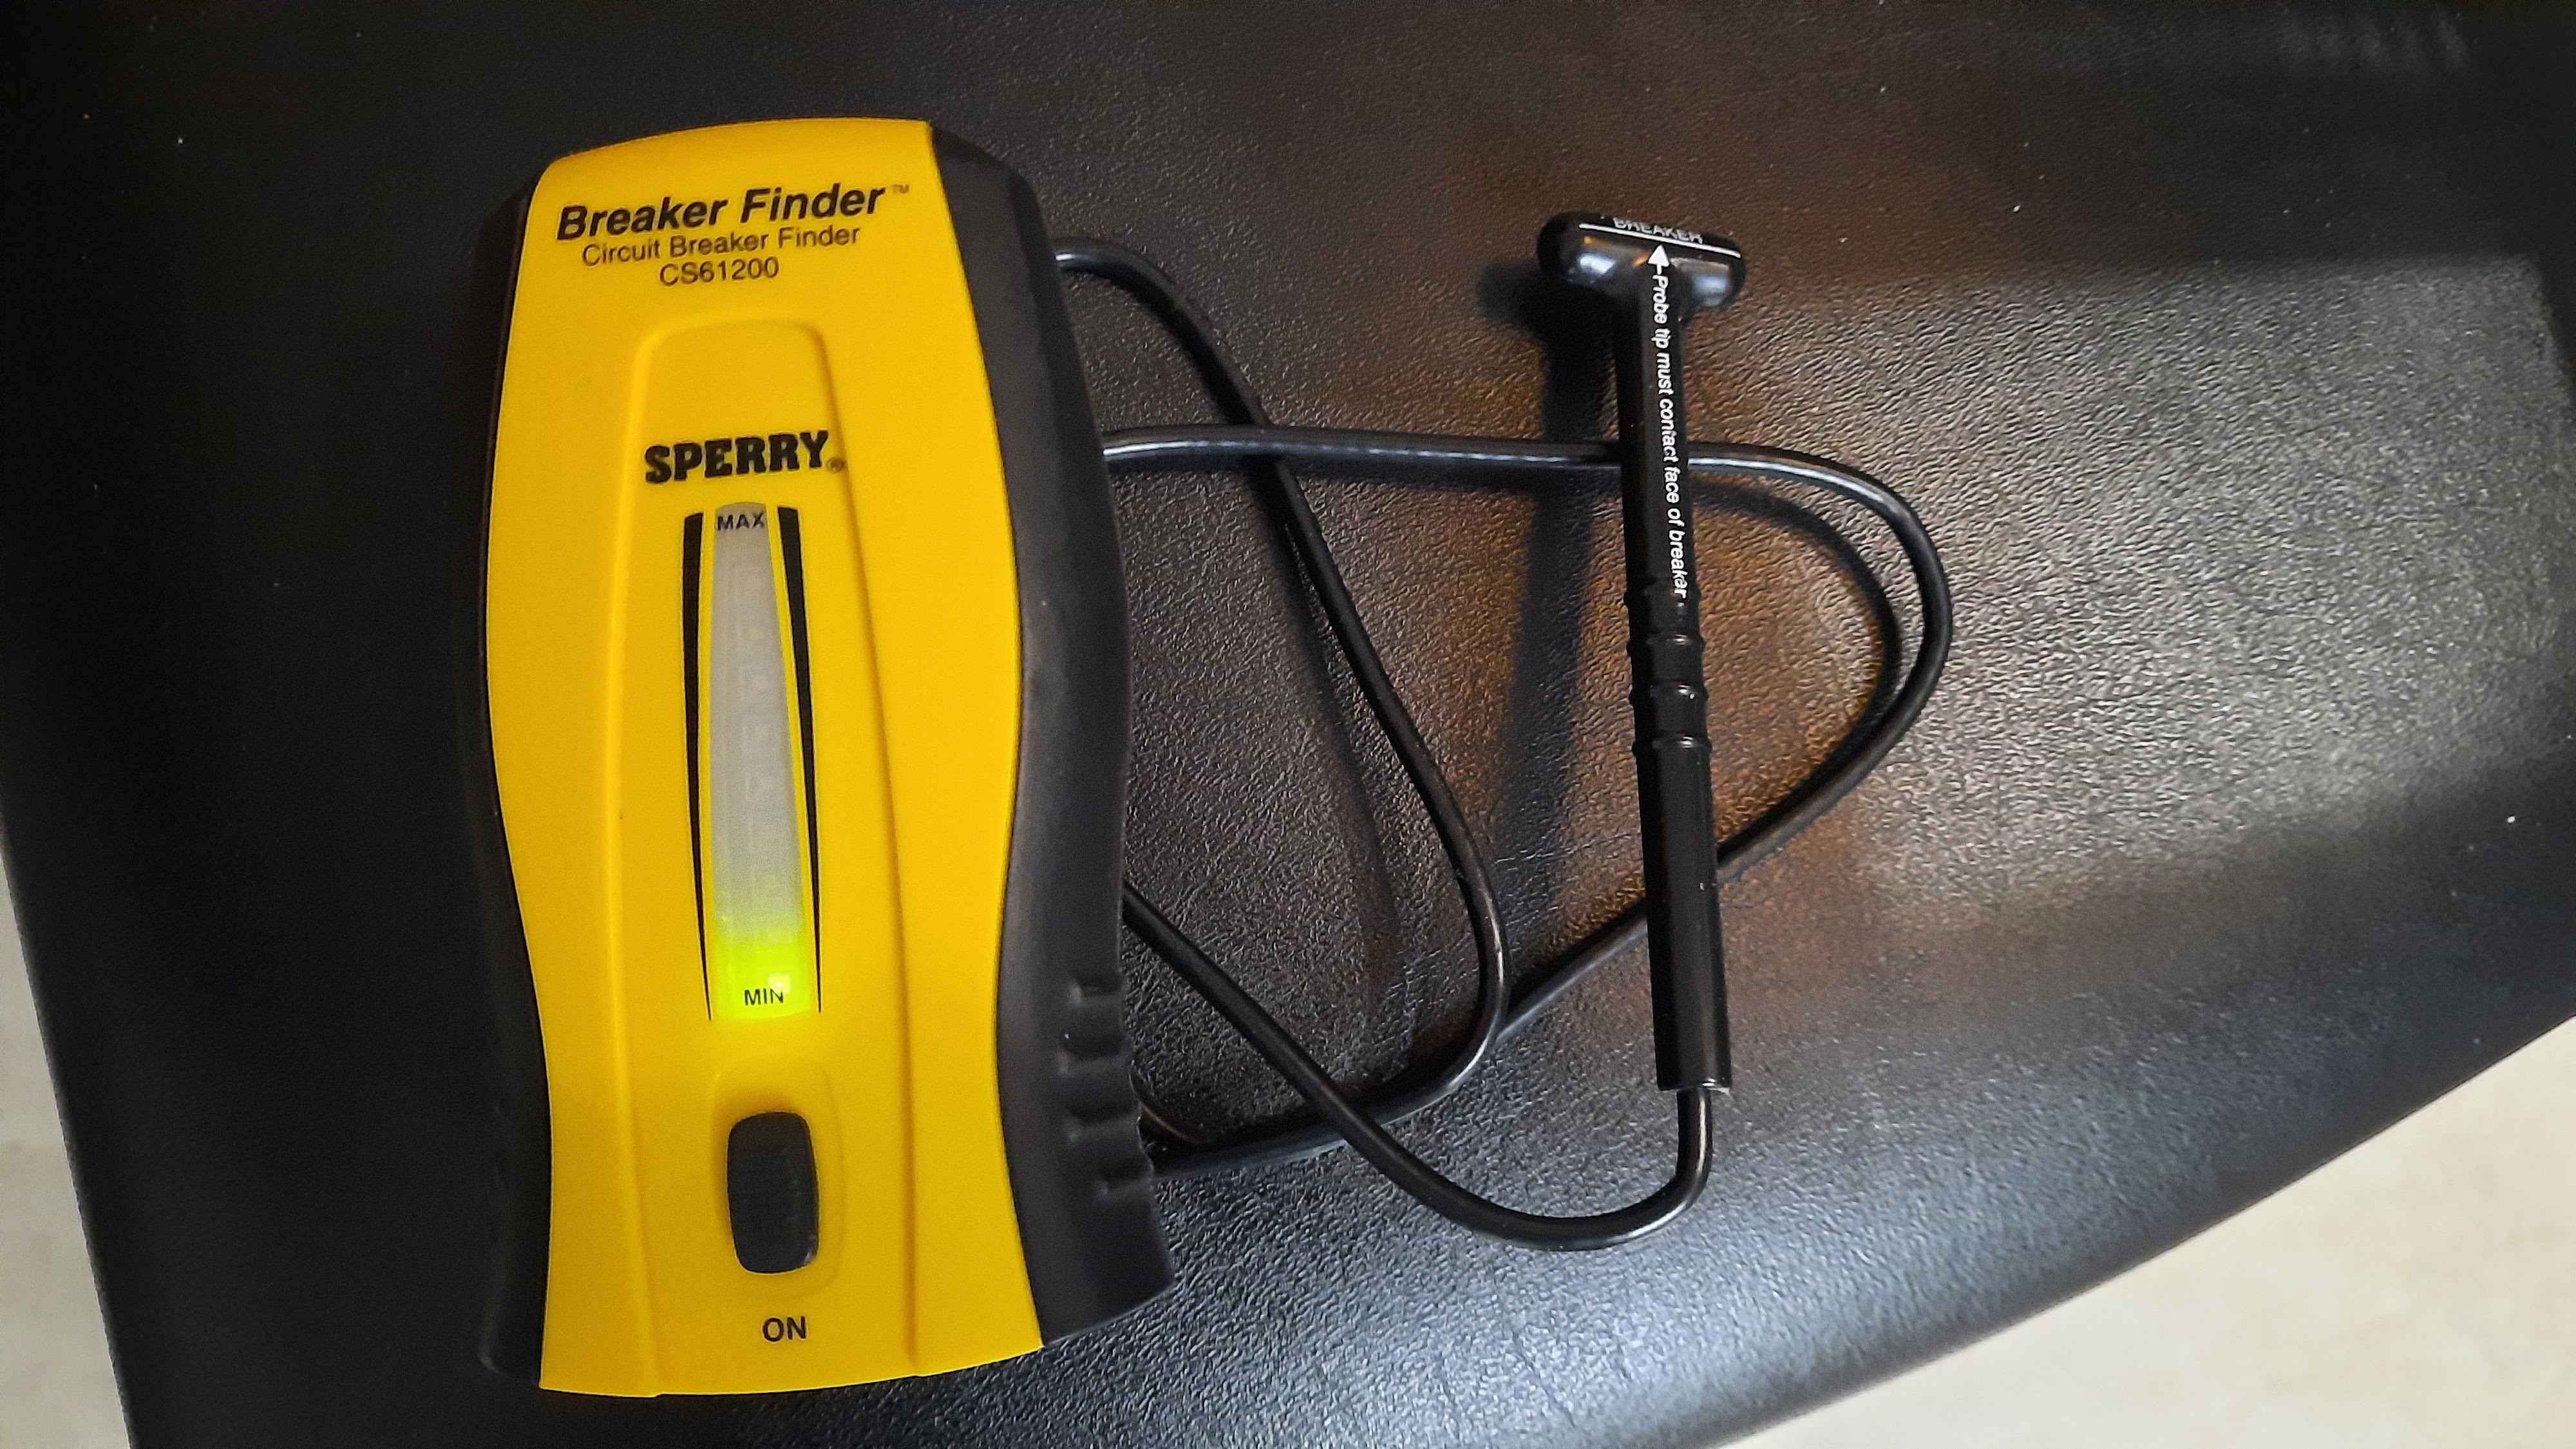
A switch in the back bedroom / Computer room was bad. It was not making a positive connection so the light would flicker when the switch was thrown or wiggled. So, how to find the breaker? How about the Breaker Finder Tool I purchased a while ago?
This tool makes a beeping noise when the probe is brought near the breaker where the other end is plugged in, or screwed into a socket. Nice theory at least. And it has worked before for me. But in this case the tool made a horrible screeching sound when the probe was anywhere near the panel, so it’s not working at all in this case. No clue why.
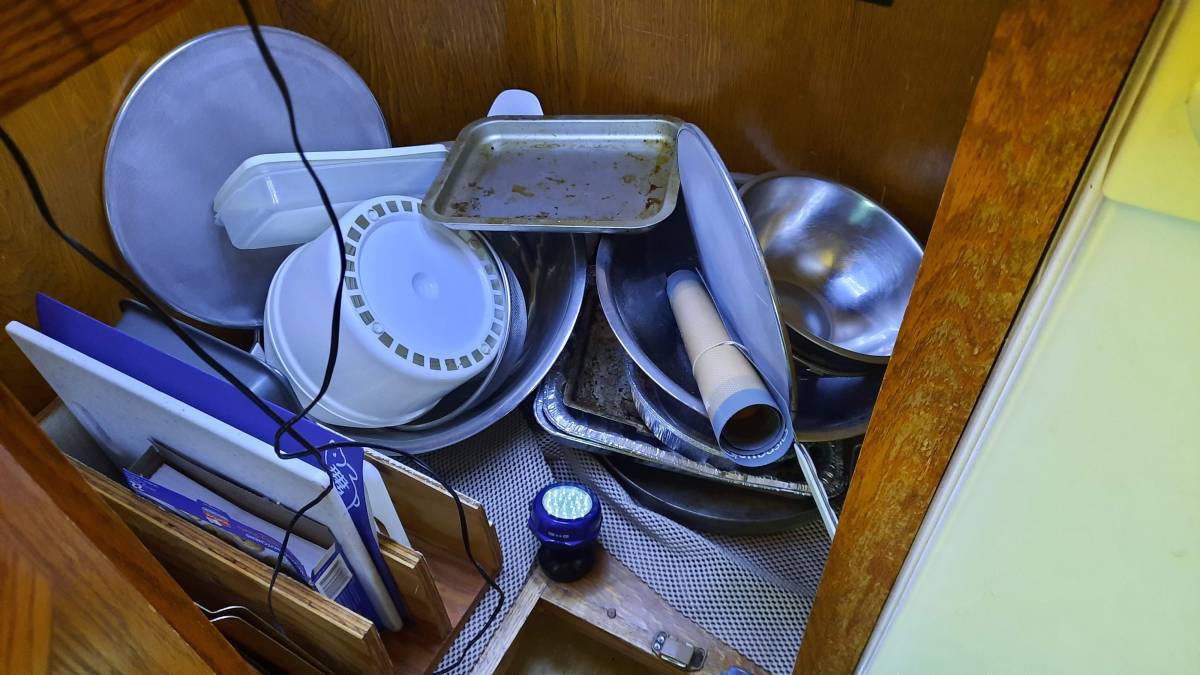
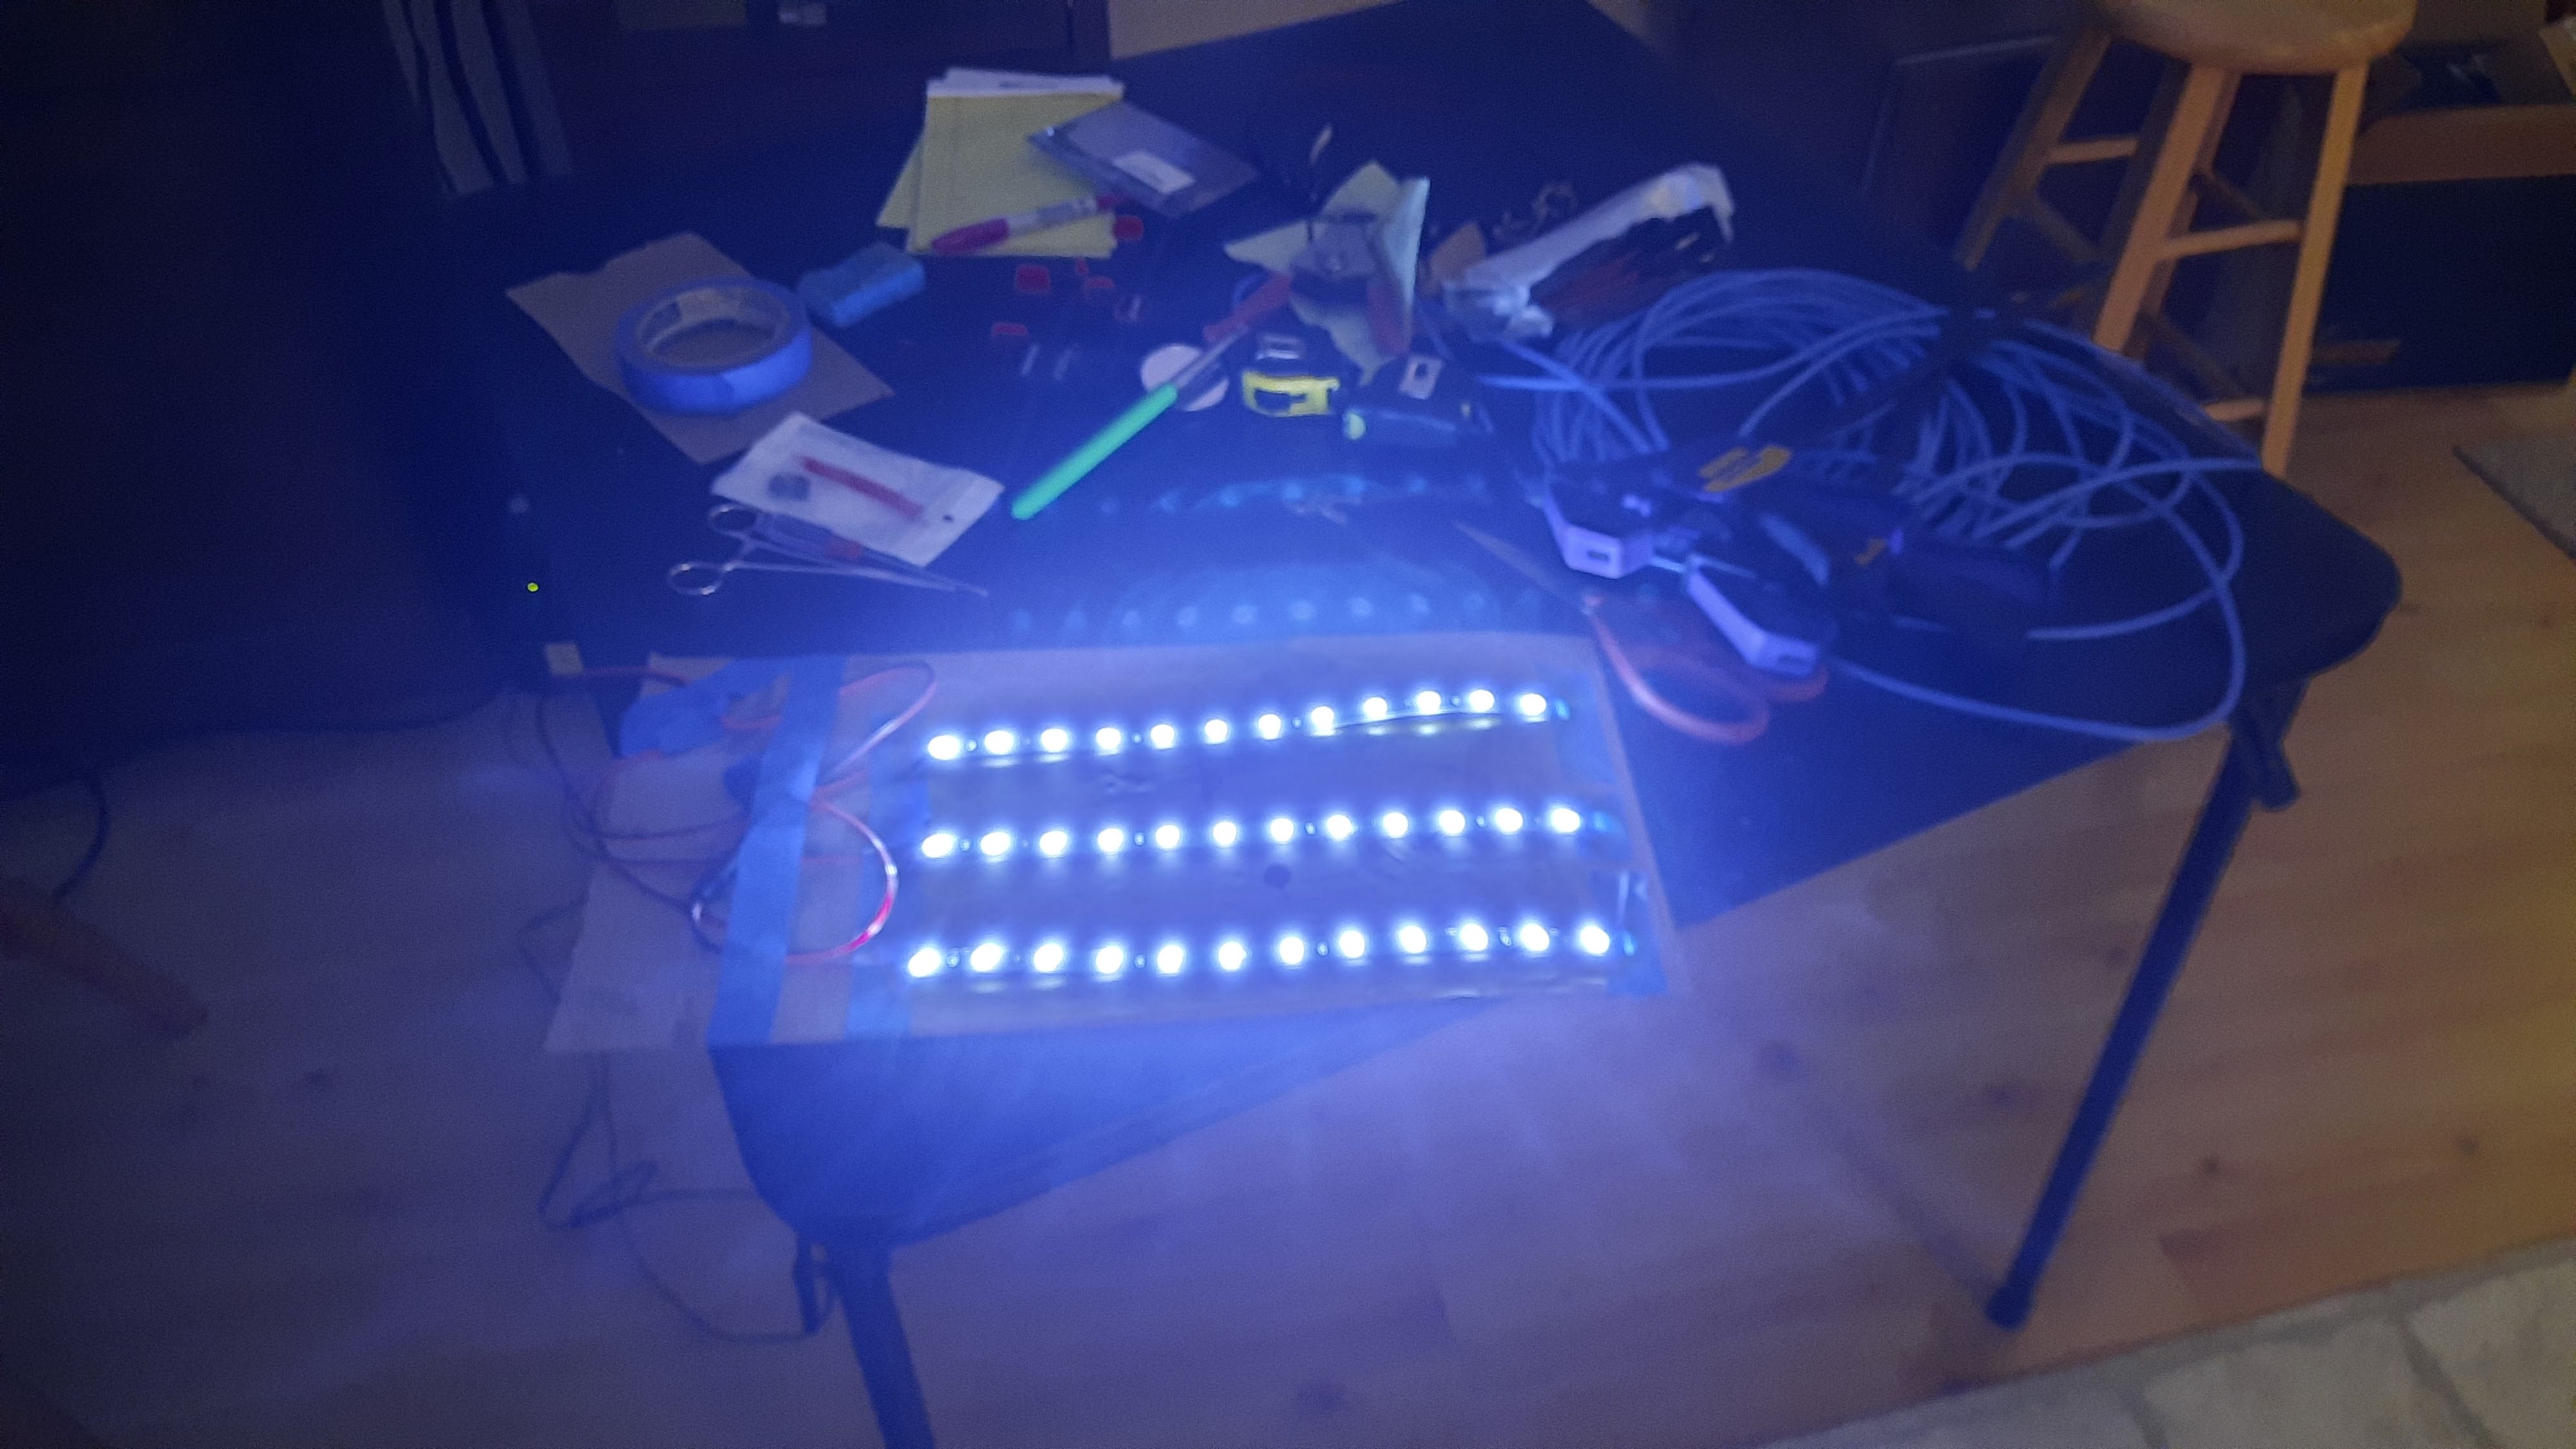
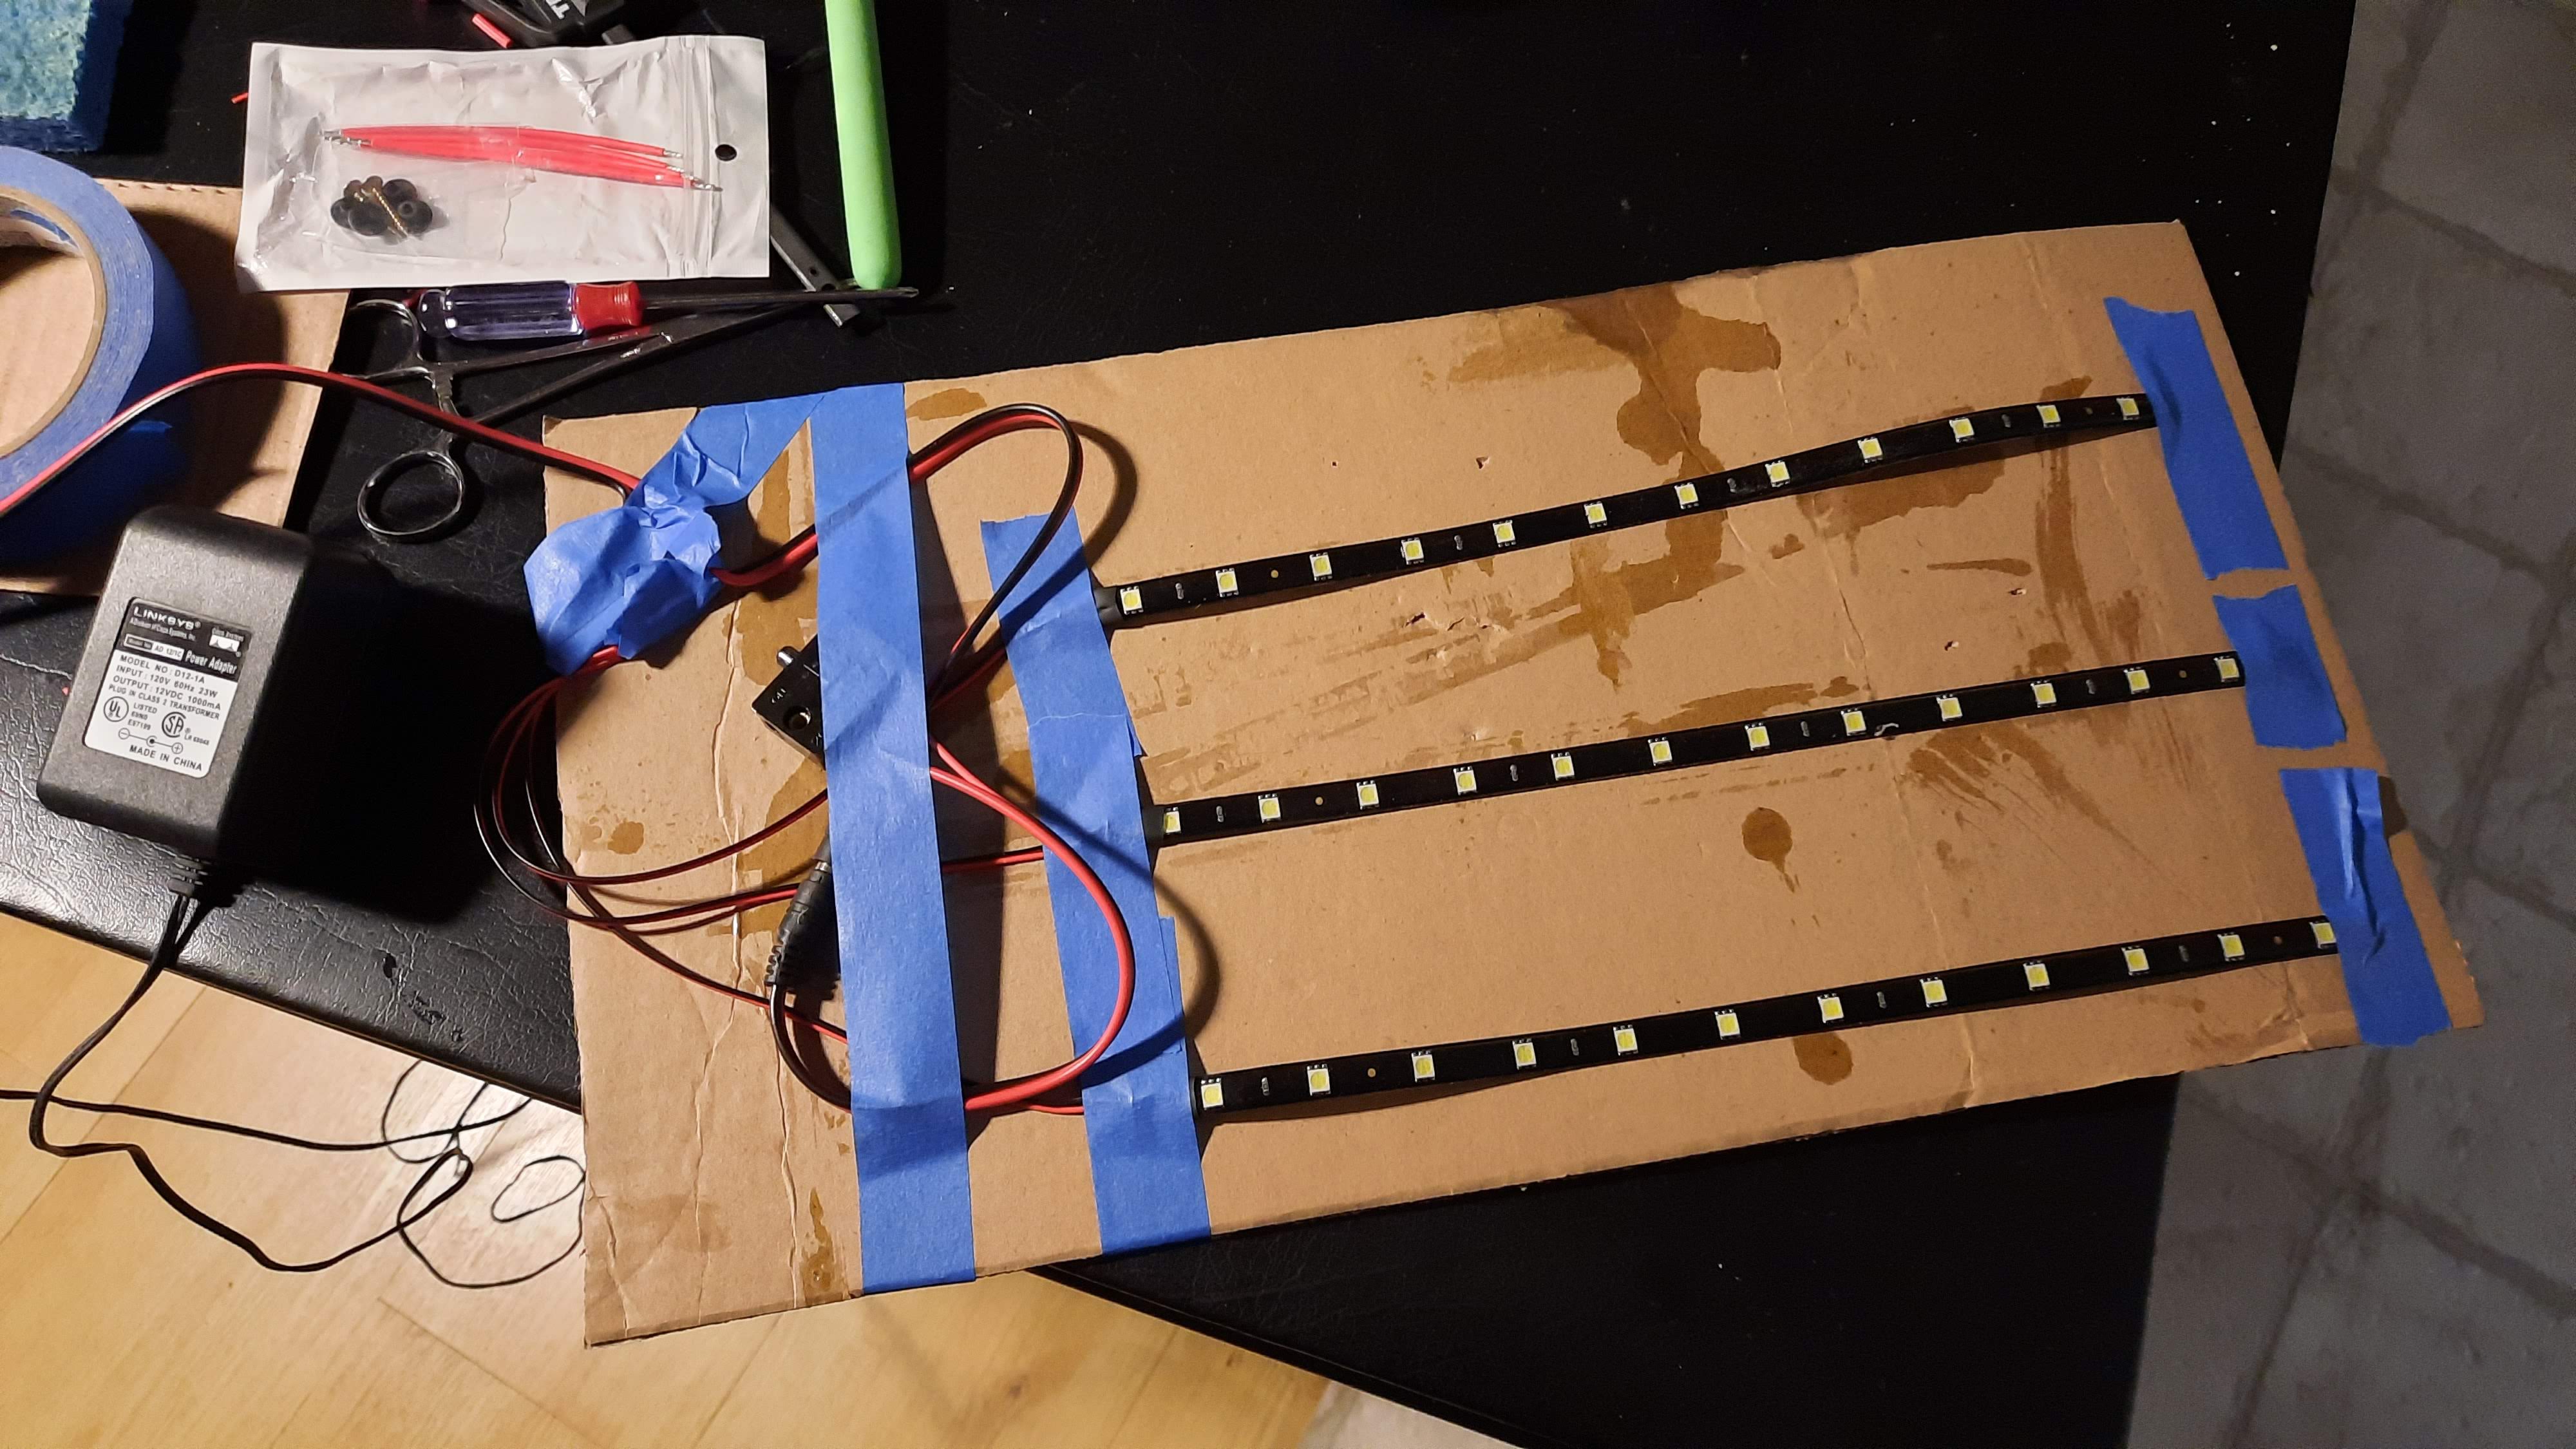
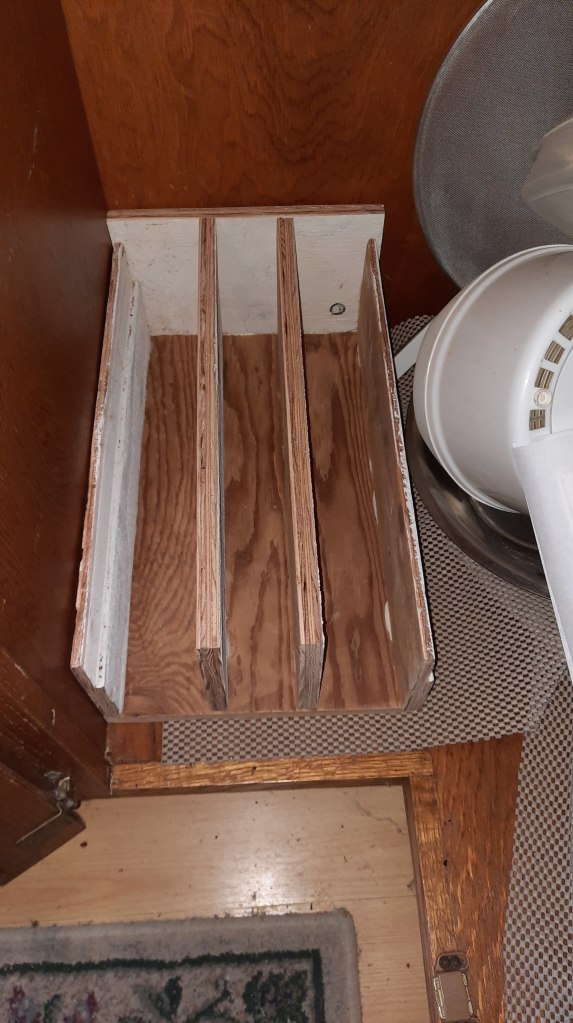
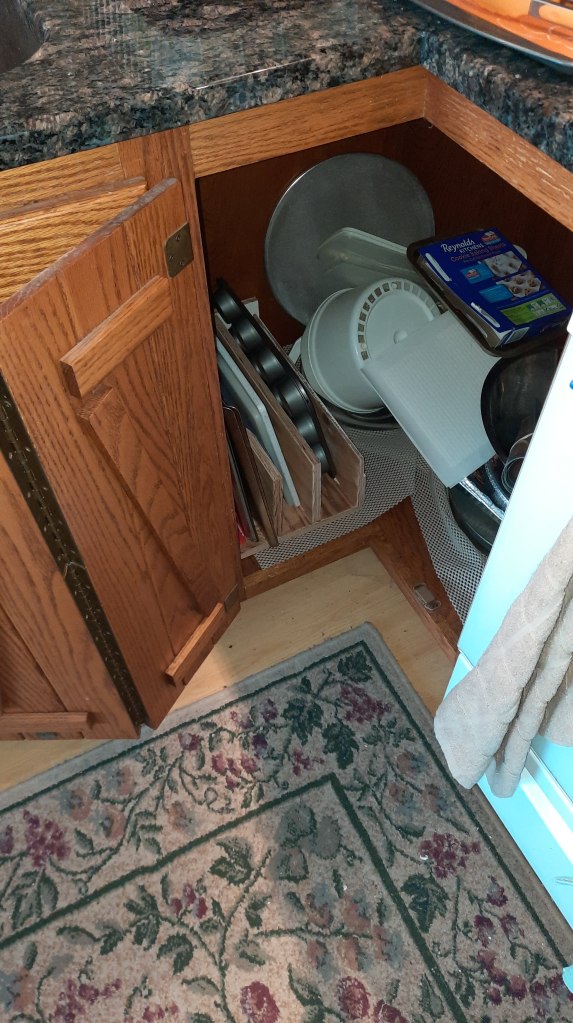
After fixing the problem in the Corner cabinet with the baking sheets, I decided that I needed a light in the cabinet since I couldn’t see easily what I needed in there.
So I got some LED light strips, from the auto section, a cabinet switch and a magnetic cabinet closure. The lights are designed to be mounted under cars. Six strips, each a foot long, running on 12 volts for $10. I have a bunch of little power supplies lying around. After running for 1/2 an hour, this supply is barely warm running three light strips.
Now I needed a board to mount the lights on to put them at the top of the cabinet.
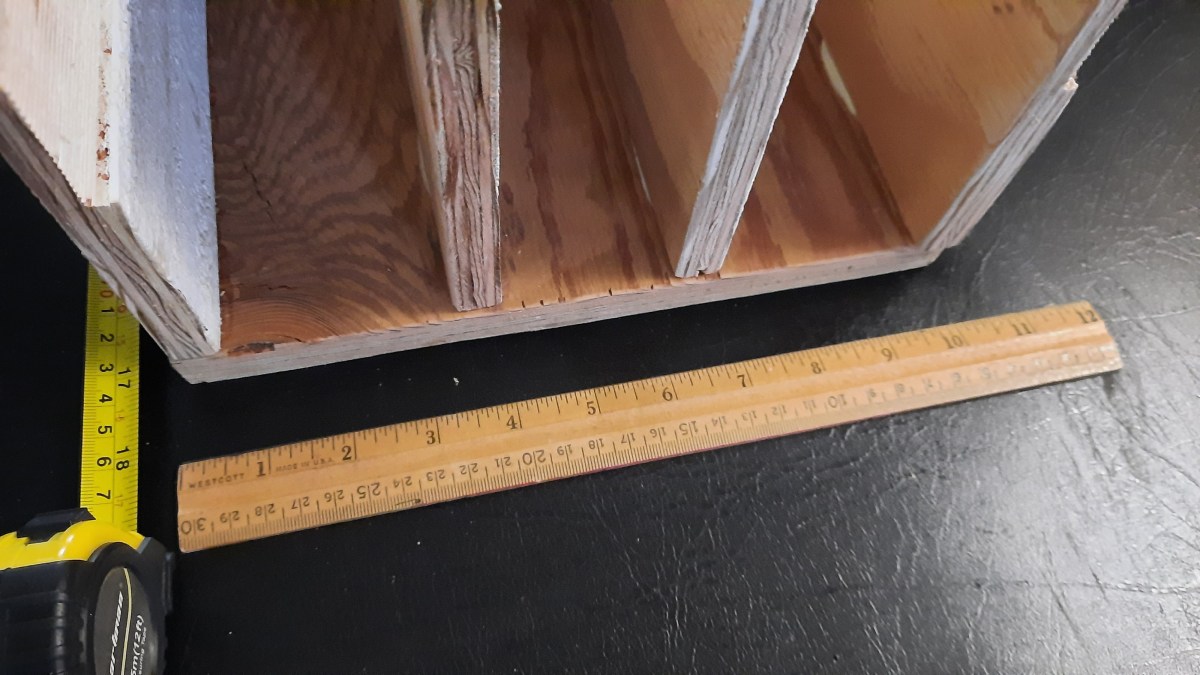
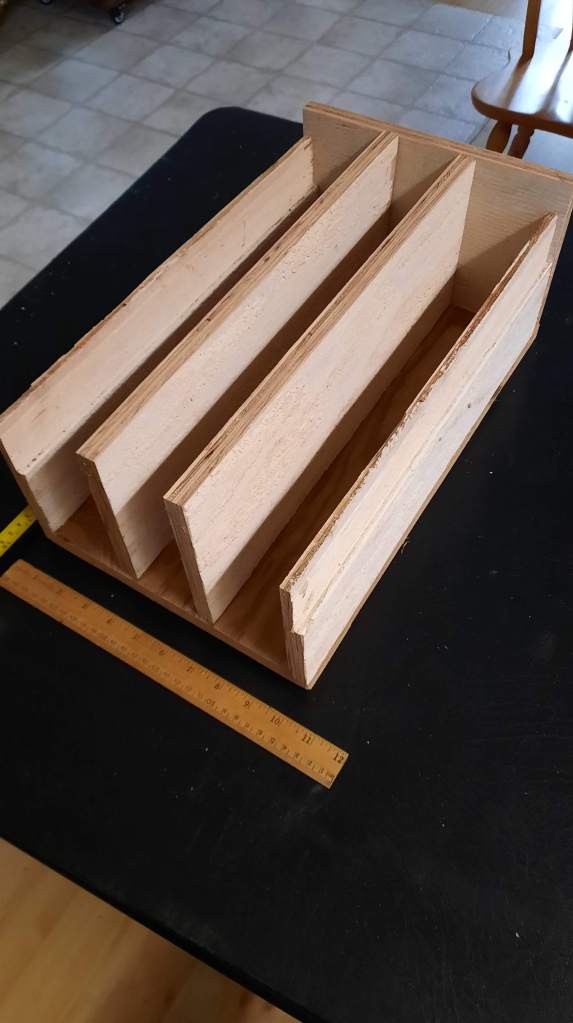
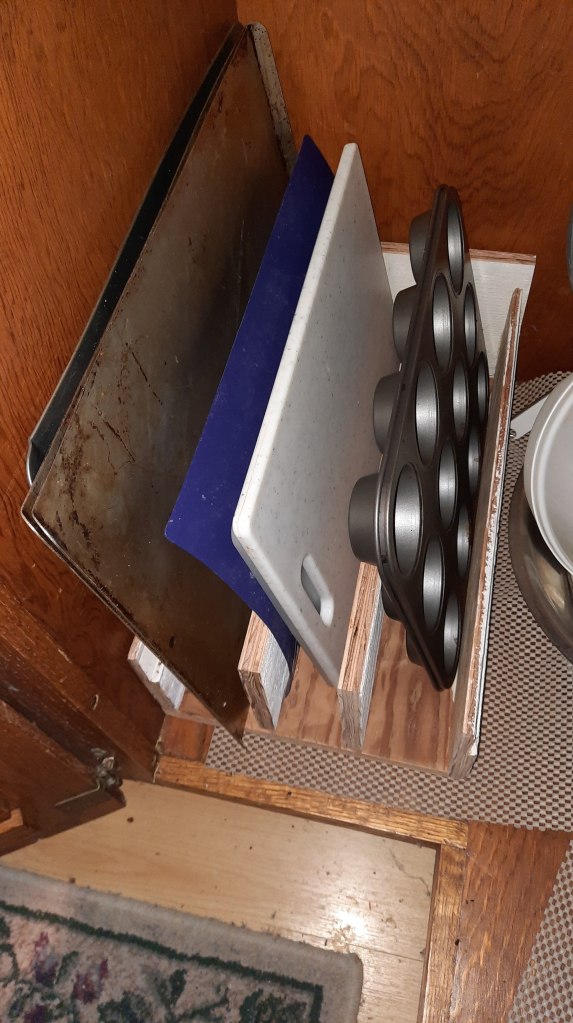
My baking sheets were all snarled up and falling over in the cabinet. So I made a stand to hold them up. I thought I was going to have to screw it down in the cabinet, but it is so heavy – 5/8″ plywood – that it sits there just fine.
There is still quite a bit of this left over Siding plywood left, so there will be more Crude projects down the pike. This is the first project using the new Belt Sander. Works great. Less dust around since it’s hooked up to the shop vac.
Stand works great. After a few days when the glue is completely dry, I’ll get around to giving it a coat of poly. :ww
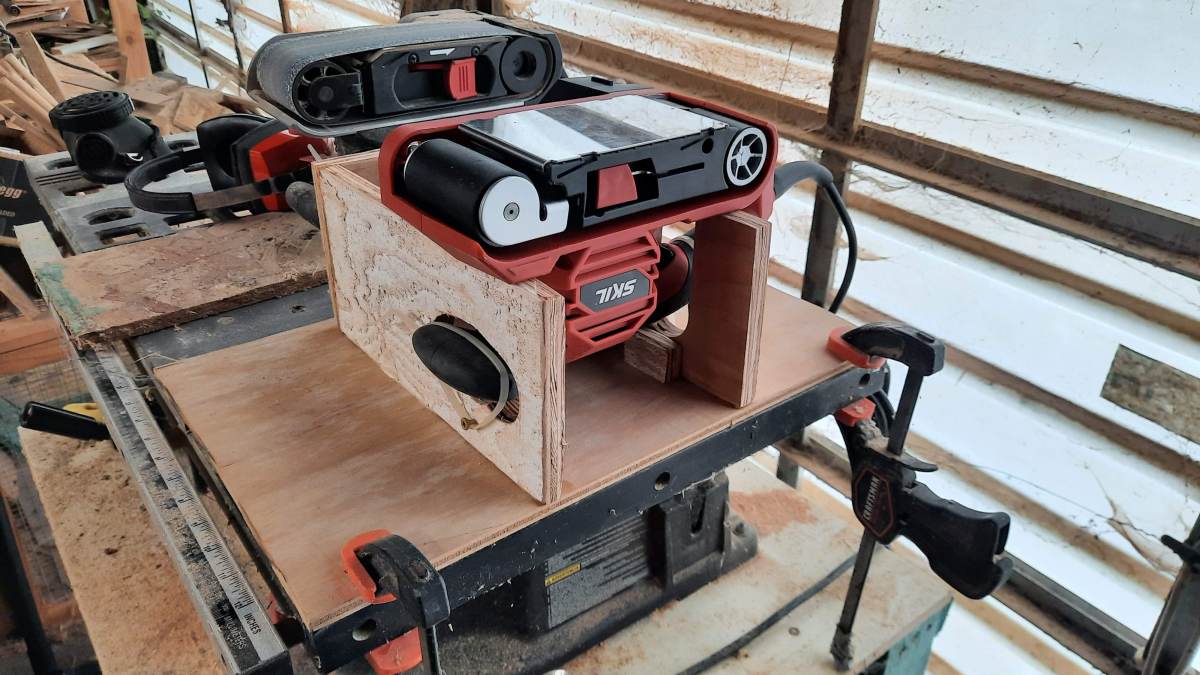
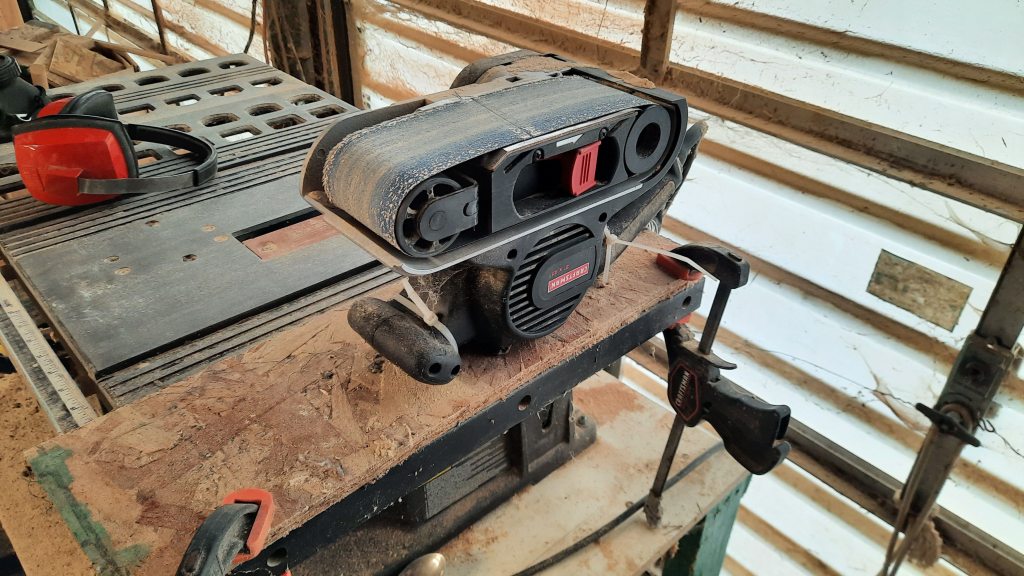
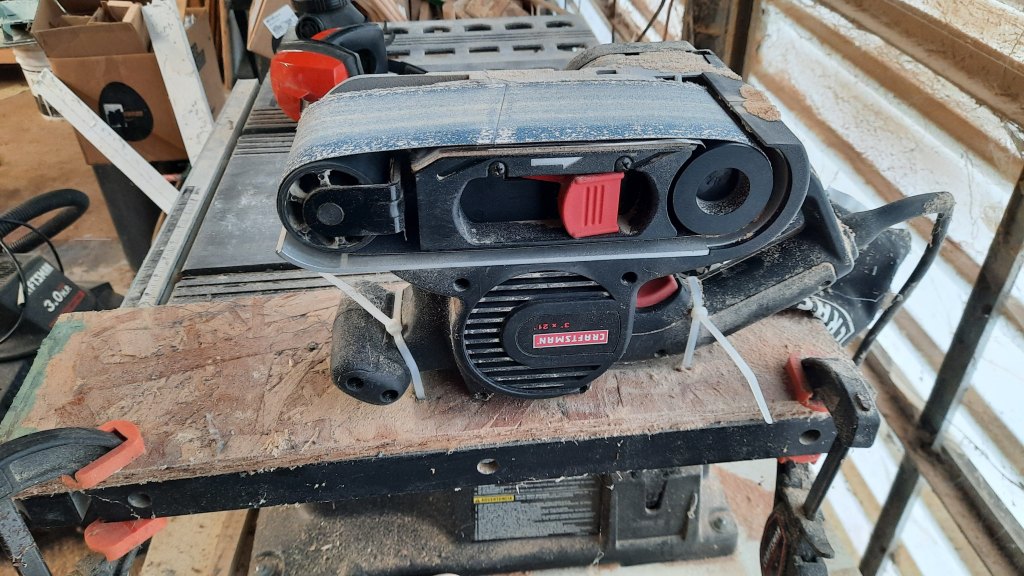
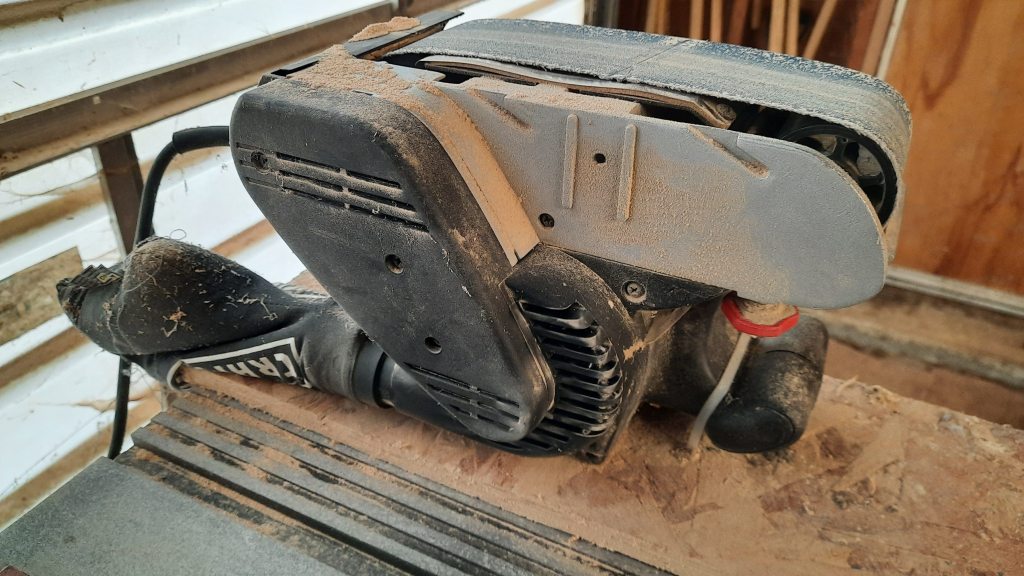
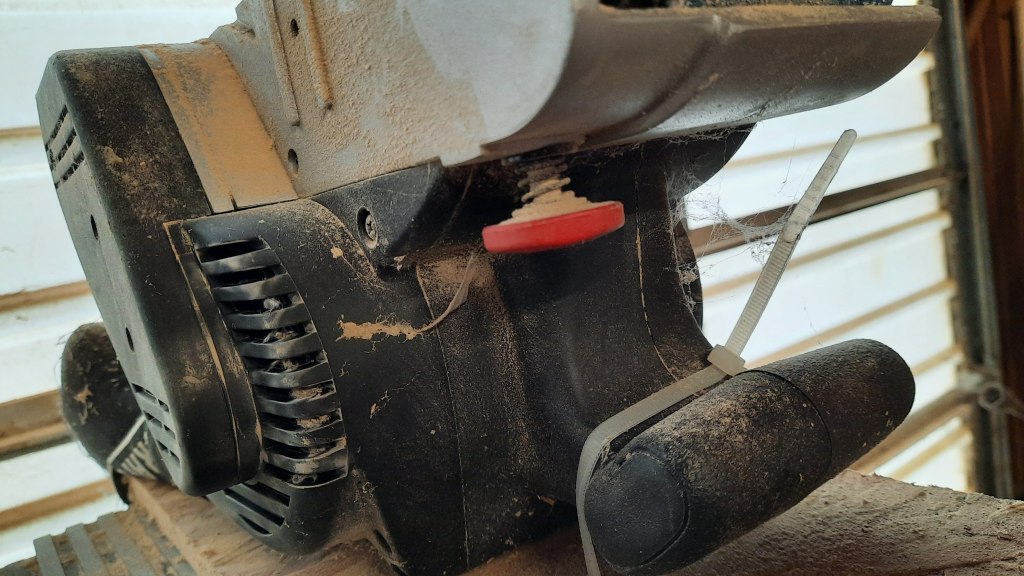
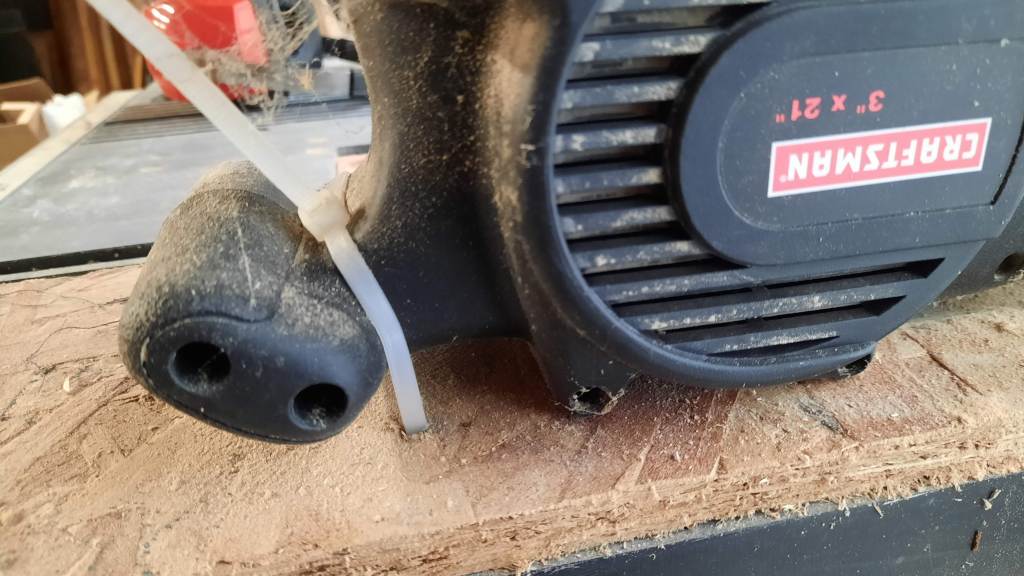
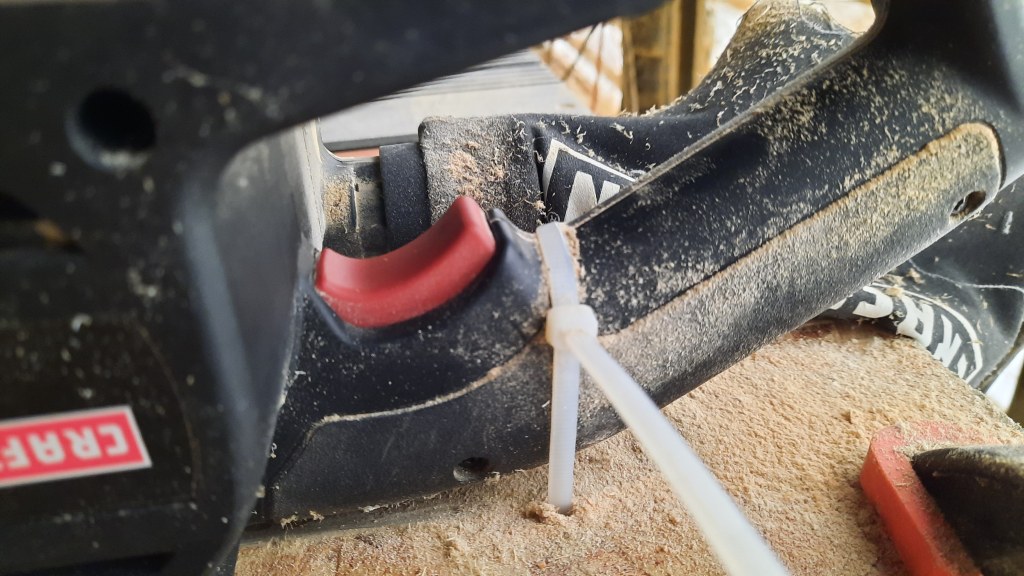
I use a hand belt sander that I’ve mounted to used it as a fixed sander. This sander has been working for many years, but the last time I used it, it was making some alarming sounds. Not sure what is wrong, but I’m guessing that a bearing or gear has worn out.
The sander has a flat “Top” so it has been easy to lash it down to a board and use it as a fixed sander. A couple of cable ties and it’s lashed down securely.
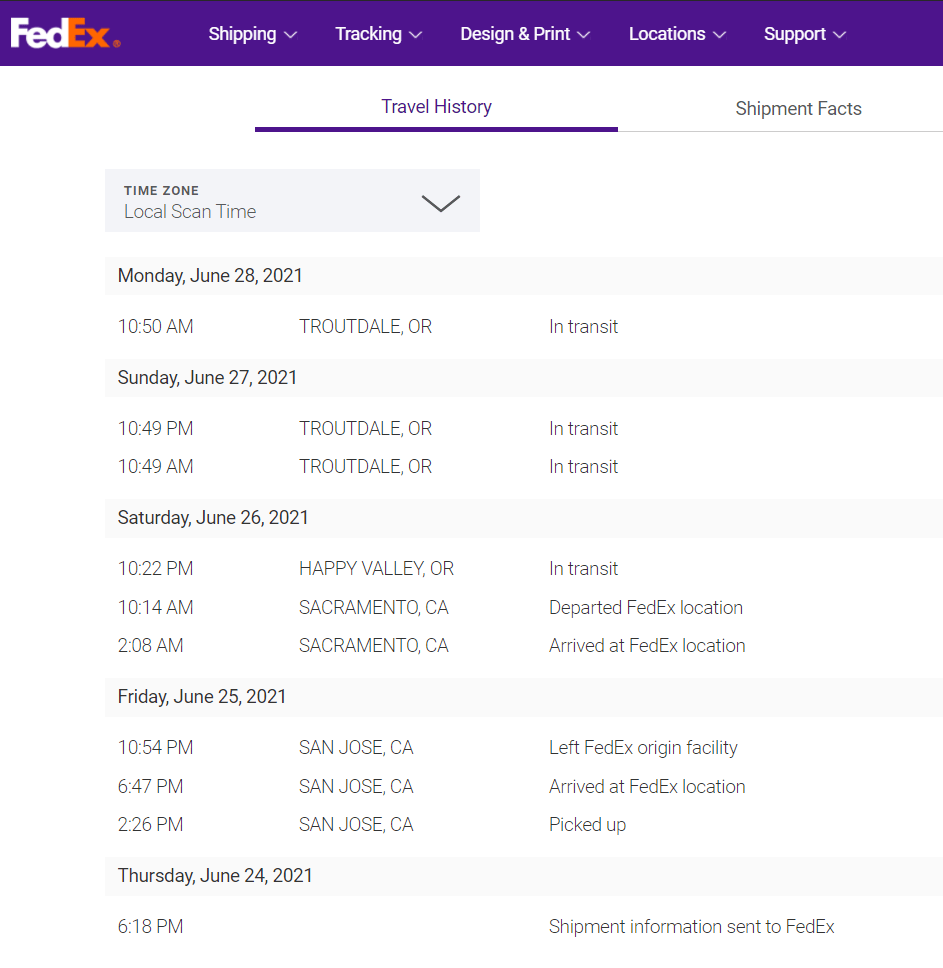
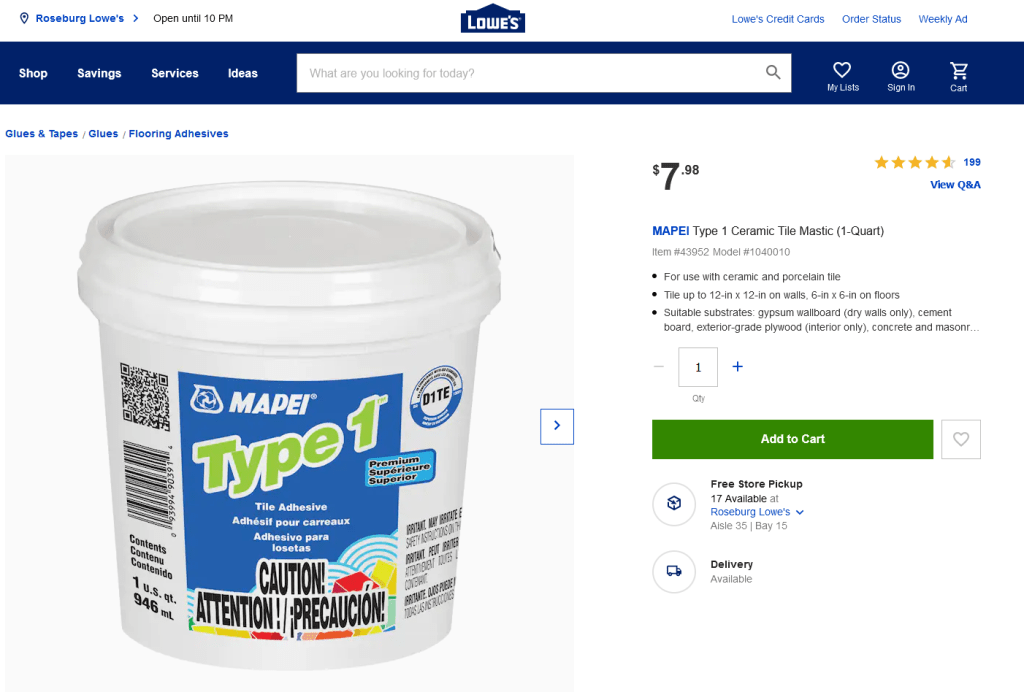
I needed a quart of Tile Mastic. Amazon had only Gallons, which is way too much. Lowe’s had quarts, and they have a store in Roseburg Oregon. I live near Charleston Oregon.
The mastic cost about $8 and shipping was another $5, but local stores in the Coos Bay area don’t carry this as far as I can tell.
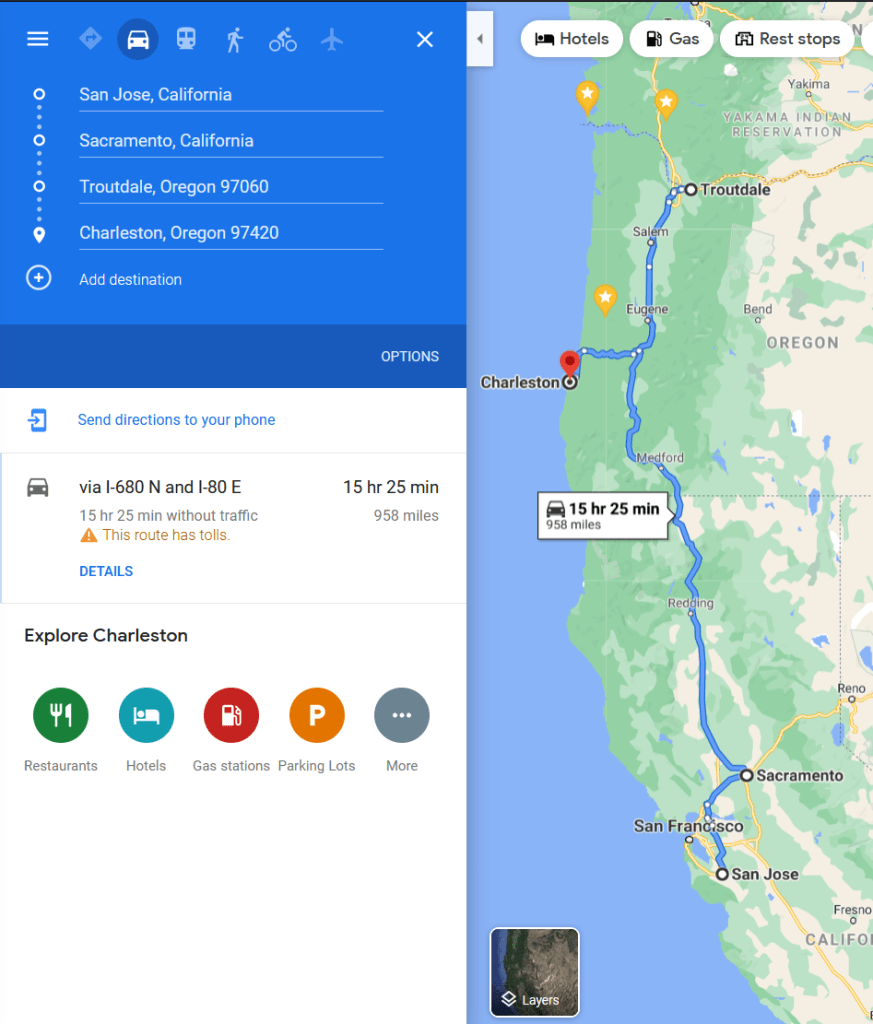
Well it’s taking a while to get it. Turns out that Lowe’s decided that the San Jose, California store could ship it to me. Not the Roseburg, Oregon store.
So here it goes:
I expect that it will be delivered tomorrow sometime after being driven all night tonight from Troutdale, through Roseburg and then to Coos Bay for delivery to Charleston.
I’m sure that Fedex shipping is very efficient. I’m sure their computers work long and hard to optimize shipping routes. It is odd that the truck does not stop somewhere along I-5 on the way from California to Portland [Troutdale is outside of Portland, Oregon]. But whatever.
It would seem that Lowe’s might spend a little more time optimizing their shipping. Their website tells me that I can pick up the item at the Lowe’s in Roseburg, but when Lowe’s ships it they ship it from San Jose, California.
I’m sure it will be fine when it arrives. Even with the unusual heat the Portland area is having right now. 115 degrees F yesterday in Portland.
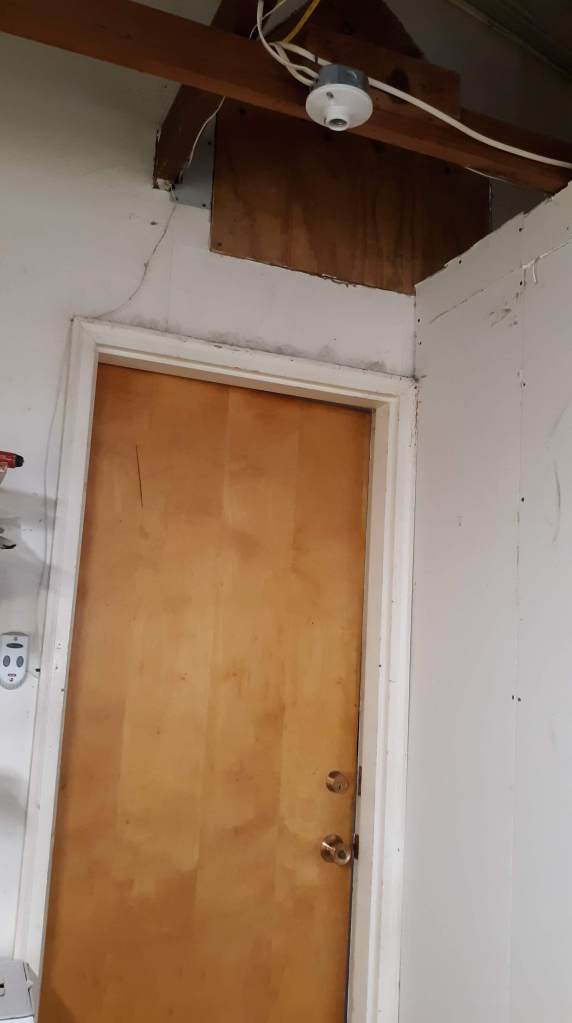
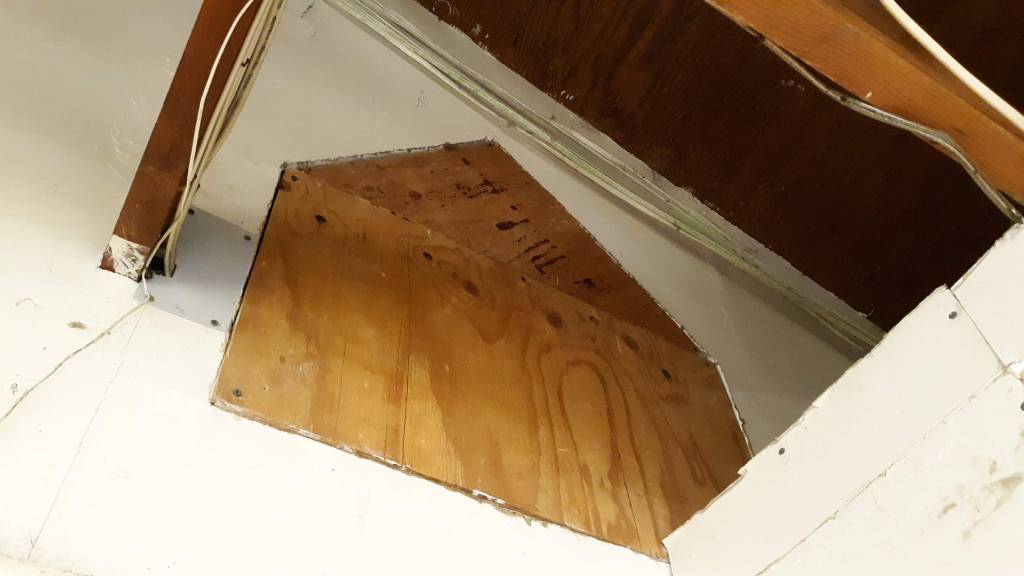
Currently my attic is accessed by removing two pieces of plywood above a doorway in the garage.
The plywood panels are held in with Drywall screws. This is a problem for several reasons:
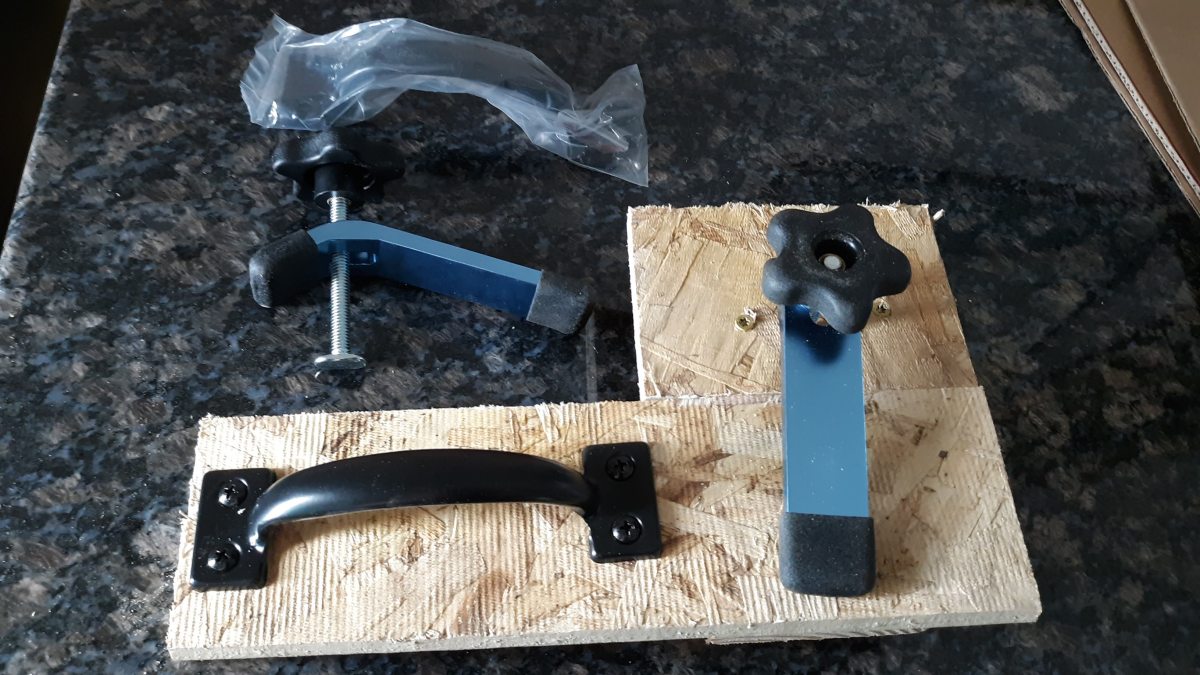
There are two pieces of plywood rather than one. Easy fix. Just screw some small board or strips of plywood to the back to join the two pieces to make one “Door”.
The plywood “Door” is held on with drywall screws which are difficult to remove and replace and a pain to retrieve if you drop them.
There are no “Handles” on the plywood “Door”. That makes it more difficult than necessary to remove and replace the door.
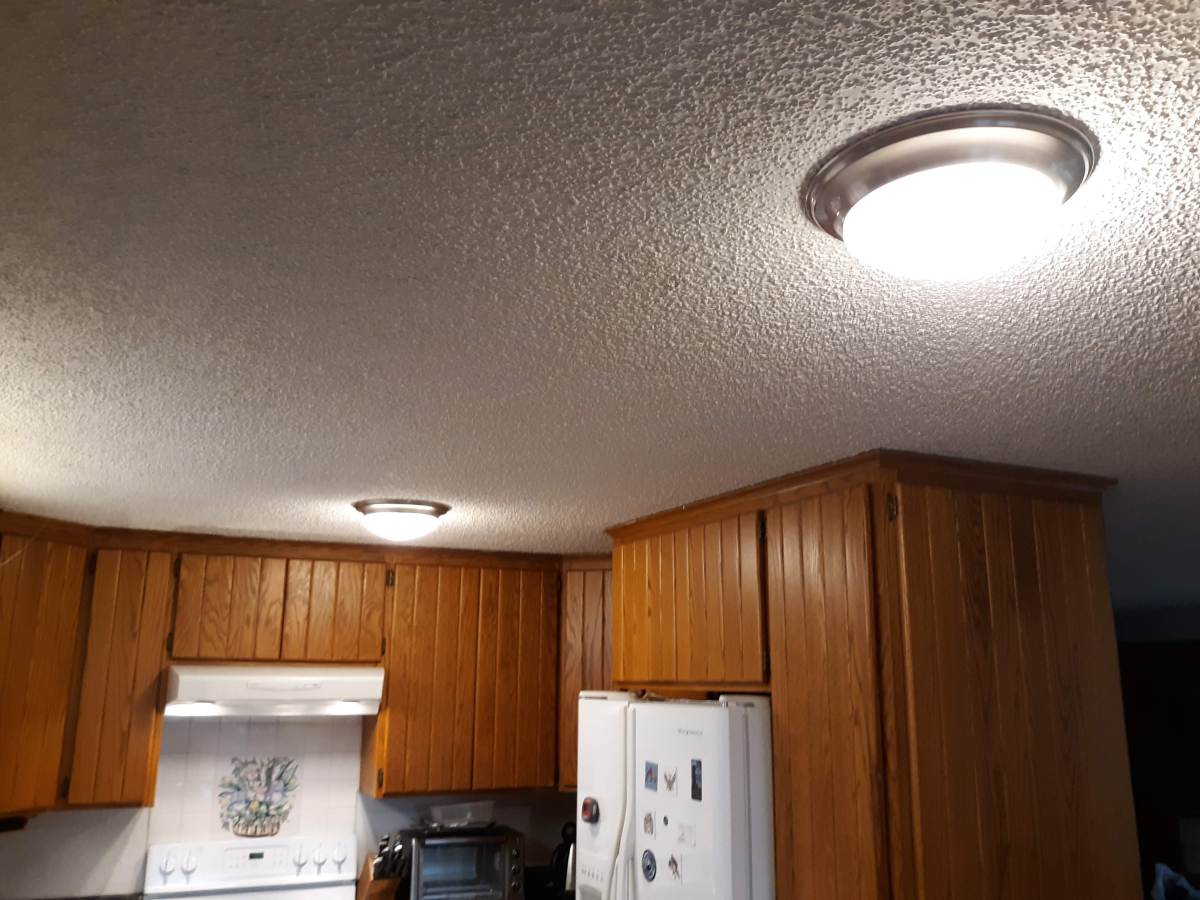
My house dates from the 1970’s, and the kitchen lighting fixtures apparently date from then too. They have LEDs, but there is lots of Spillover around the shades and with LEDs they are too bright. By spillover I mean that far away from the fixture you are looking directly at the bulb rather than through the shade. Notice the attempt to dim one of them by adding Trash Bag plastic to the shade. Not a good idea with Incandescent bulbs, but no problem with heat from LEDs. Anyway that was a failure. The spillover made that useless.
Time for an upgrade.
Wayfair had some nice ones for not a lot of money and free shipping.
WhooHoo… We are rock’n in the 90’s now. Ok So a Can Lighting upgrade was too much work. But these only have one bulb, which is right for using LEDs and they are attractive and spillover free.