

Every post should start with an interesting picture.
Ok. Now for the article.
I’m using a Linux Mint system hooked to my TV to watch Netcasts from the Twit.tv network and other things. It’s built using an Thermaltake Armor 30 case and a Core i5 Haswell processor, 8GB RAM, GFX 640 graphics, and a 250GB HD.
But the system is slow. So I’ve decided that the best approach would be to get a cheap SSD for it. I found a Refurbished 60GB SSD on Newegg for about $40. That should do the trick. Given there aren’t that many apps installed on the Linux system, it uses far less than 60GB, so the small size is no problem.
Migration to SSD
I don’t want to completely rebuild the system. I’d rather migrate it to the SSD. A forum post led me to using gparted to migrate the partitions from the 250GB hard drive to the SSD. Also, it seems best to test this scheme using a virtual machine before I actually migrate the system. One of the VMs I keep current is a Linux Mint 15 system in a 60GB VM disk on my Windows 7 system. I use Virtual Box.
After I did the experiments with the VM, I successfully migrated a 250GB HD – 9GB used- to a 60GB SSD with no problems using this scheme.
gparted to migrate the partitions
Install the SSD in the system as a second disk and boot the Live DVD for Linux Mint. I did not use a USB drive adapter, but that may work fine as well. I attached the SSD directly to a SATA connection.
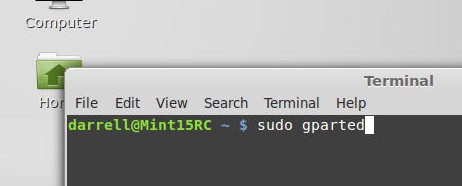
Start gparted from your liveDVD.

Notice that gparted shows you the size of the partitions on the HD as well as the amount of space actually used. Linux Mint is quite small. This is from the VM test where the virtual disk is only 60GB.
Create a partition table and ext4 and linux-swap partition on the SSD.

Again, this is from the VM test where the target virtual “SSD” was only 20GB.
Of course the yellow area will not exist on the partition right after you create it. I see that the partition layout is not exactly the same. The original layout has the linux-swap partition in a sub partition or something. I don’t know how to create that, but it does not seem to matter. I guess the swap partition should be twice the size of the RAM.
Right click on the partition and manage flags to set the boot flag on the main partition on the SSD. This is critical.
Shrink the Original Partition
Recall that you are running gparted from a live DVD, so you can mess with the files and partitions on the HDs and SSD without messing anything up. These functions won’t work from a running system. They are just greyed out.
Now comes the tricky part. You need to shrink the partition on the original hard drive to less than the size of the target partition on the SSD. Presumably you have removed enough files so that the files will all fit on the SSD. If not, you’ll need to boot the system normally and backup / remove enough files so that the system fits on the SSD.
Gparted has two nifty commands:
- Resize partition – make a partition smaller or larger. This preserves the files on the partition. You probably should back up the partition in case something goes wrong, but I’ve used this several times and it’s reliable. You will be shrinking the partition on the current disk.
- Copy / Paste partition – copy the contents of a partition to another partition. Yep. Sure does.
So, again, running from gparted on the Live DVD, shrink the original system partition to a size slightly smaller than the partition on the SSD. Commit this change with Apply.

This is the result. Again this is from the test on the virtual machine. My hardware machine had a 250GB HD and a 60GB SSD so the target size for the system was about 50GB with an 8GB swap partition. Once the shrink is done you can Copy the contents to the SSD.
Then use Copy and Paste to copy the shrunken system partition to the SSD.

Here is the resulting copy. Again notice that the main partition on the SSD has the boot flag set.
Installing Grub
Now you need to install Grub on the new disk so that it will boot. This is easy. Again from your Live DVD open another terminal.
Here is the tutorial from the Linux Mint site.
Run a new terminal so you can leave gparted open for reference. Notice the drive designation for the SSD. /dev/sdXY. Now do the following commands in that second terminal:
sudo mount /dev/sdXY /mnt where sdXY is the SSD displayed by gparted.
sudo grub-install –root-directory=/mnt/ /dev/sdX and do not include the Y in this command from the sdXY.
Boot the SSD
That’s it. You can now remove the original system HD and try to boot the SSD. It’s ok to move the SSD to another sata slot if you like before rebooting.
If it doesn’t boot, you may have forgotten the boot flag. I did this several times on a Virtual Machine [Virtual Box running on a Windows 7 host] to test the procedure and then on my real system. Worked fine for me.
Enjoy.
ww
