
Corel Video Studio Pro X5 is a great and inexpensive video editing suite for editing and burning both DVDs and BluRay disks.
I’ve been capturing game play footage from video games and wanted to make BluRay disks of that footage to remember and share what it’s like to play some of these games. I captured the game footage with Fraps as full screen on my 1600×900 monitor with sound. Fraps allows you to define a hot key to start and end your video capture, so at anytime while you are playing the game, you can start recording video. Corel VS made it easy to edit the videos, adjust clips, make short video backgrounds for the menus, and then burn the BluRay disks.
While I am making BluRay disks from video game footage, you can use any HD footage from your vacation, kids or whatever. The process is the same.
There are a ton of options, transitions, effects and other things in Corel Video Studio. I don’t use any of those, although I have used the titles. They are easy to apply if you want to use them, and there are tutorials on the Corel site and YouTube to give you more help.
Your System
To capture game footage while you play, you will want a Core i5 or better with 4 or more threads and at least 8GB of RAM
to allow fraps and the game to run concurrently without delays. Your system is probably at least this good if you are playing video games. This speed processor is just what you need for a great Video Editing experience. Also you will want a dedicated video work disk. I use a 1TB WD Black – high performance – disk, and I’ve recently added a second one for the destination of the BluRay temporary workspace and output folders. More on that later. Of course you will have a moderate to high end video card if you are playing games.
Organizing the Videos

Using Fraps, you can define a folder to hold your captured videos. Of course you will want this on one of your video work disks. Each game you play can have it’s own folder.
In CVS, you can create folders, import your videos and then drag your clips to the folders to organize them.
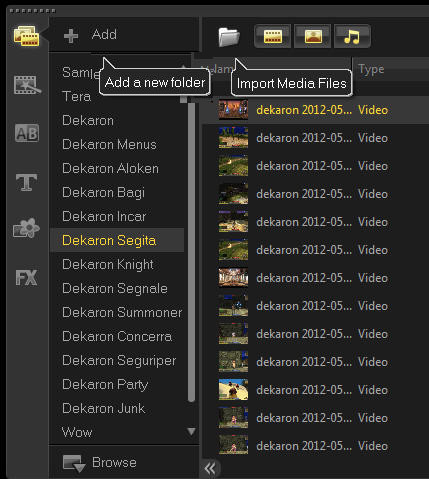
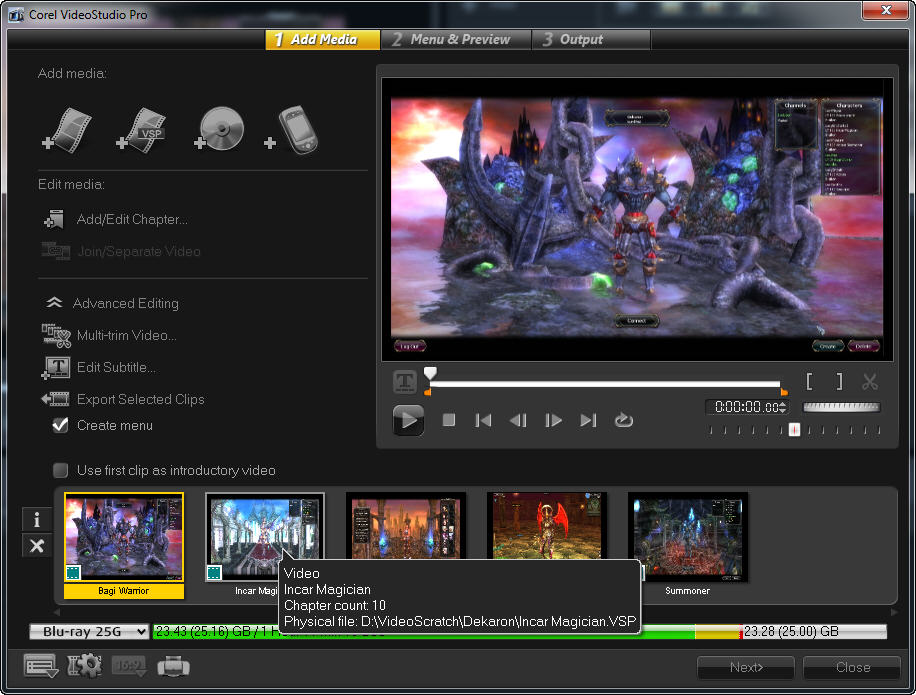
Add one or more folders, then select one and import your videos to a folder. Now as your click on each clip, it will show on the left panel and you can drag the thumbnail on the right list into the folder. With Fraps, each clip gets a name that you specify with the date and time added to the name. Unfortunately, CVS does not allow you to have nested folders, but if you start each folder with the name of the game or some other common string, then they will sort together, as shown above.
Editing your Videos
If you are like me, you want to collect your material together by subject, in this case by the class of the game character. Even though the footage was shot at different times, I wanted to collect it together by character class, so after organizing the clips that way, I created projects for each class. To make each project I reviewed the clips by clicking on them in the right panel. Click on a folder to see those clips and then as you click on each clip you see it in the left panel. Click the next picture to see it in more detail.
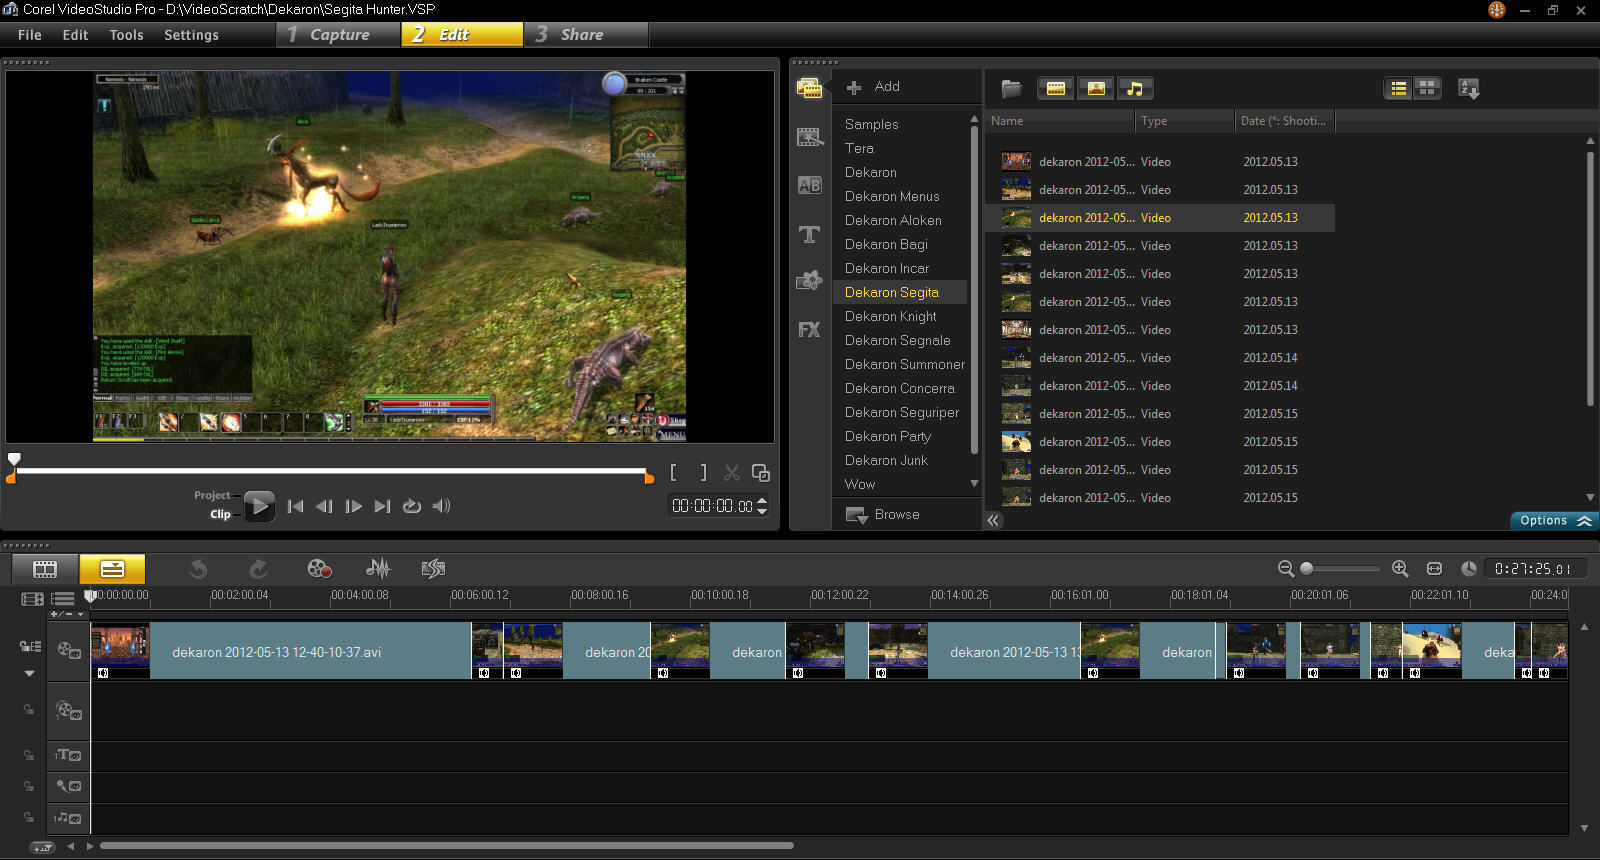
As you review each clip you can set the start and end points, then drag it into the timeline below. You can right click on the clips in the timeline to set many options, such as sound fade in / out.
Be sure and save your projects with normal names you would like to see in your BluRay menus. That will save you a lot of time since the names of the menu pages are taken from the names of the projects you add to make up your BluRay disk. Making a DVD is the same process if that’s what you want to build.
Building a BluRay Disk
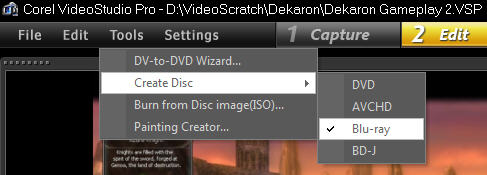
Once you have several projects created you are ready to build your BluRay disk. You can build a disk using any of the projects, but I chose to make a new empty project that was named by the disk that I was creating. To do this, create a New empty project and choose Tools >> Create Disk >> BluRay disk.
Now a disc creation project appears.
Add your BluRay project files, the VSP files, to this timeline. This is counter intuitive. At first I thought that you needed to render the individual projects and add the videos in this step. And you can do that, but if you add the projects, then in the future any changes you make will be incorporated into the disc project automatically.
As you add your projects, notice the colored line across the bottom of the wizard. This is the project length. Don’t make it too long. Stop in the yellow, or in this case with only a tiny bit of red. If there is too much Red, your project is to long to fit on the size of disk you have selected from the drop down on the left end of that line.
When you close this wizard, the project is saved inside the currently open project. So you need to save that outside project as well. You may want to stop a few times during the process to save your work as you go in case something goes wrong.
Add Chapters
You will probably want to add chapters to each of your video projects at this point. Just select a project and click Add / Edit Chapters on the left side. A panel will come up so you can add chapters to your video. Even if you have not rendered the video of a project, this works perfectly well. If you make any changes to a project, then you will need to redo the chapters for that project.
Add Menus
When you have added chapter points to all your projects, click the next button at the bottom to go to the menu portion of the wizard.
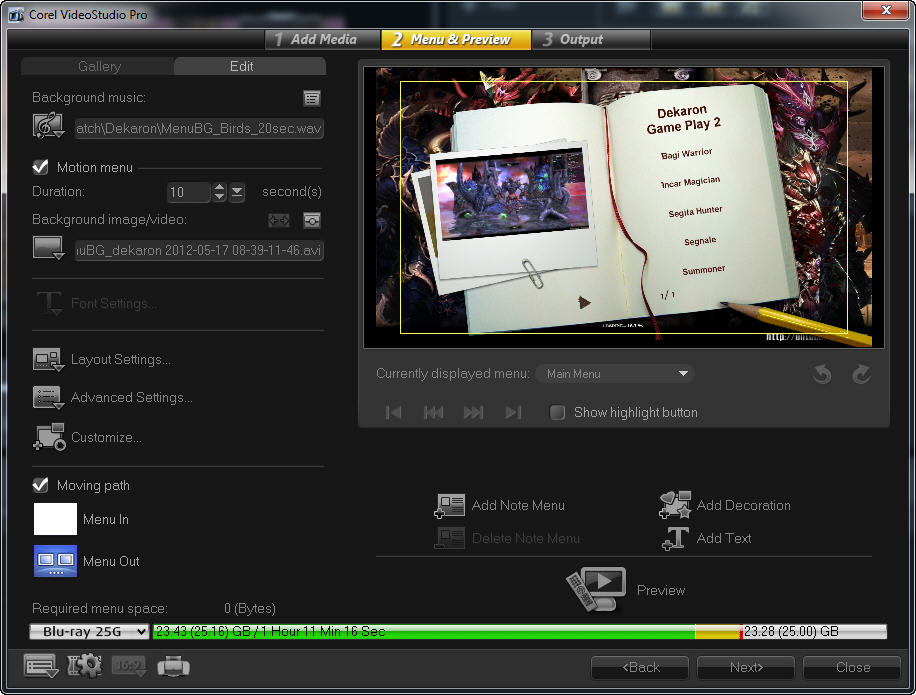
With Core VS Pro X5 there is only one BluRay Menu template to choose from. There are many DVD templates, but only one BluRay template. It looks like you can create your own, Or modify this one extensively and save it as a template, but I haven’t done that so far. But there is some customization you can do to the menu template in the Edit tab. I suggest building a project to build your menu resources. You will want a 20 second [ or so] sound loop and a 20 second menu background video. In the case of the Dekaron projects, I’ve chosen a loading screen from one of the games, and chirping birds that you hear throughout the game. You can add these to all your menu pages in the Edit tab of the menu wizard.
Burning the Project
I choose to burn Folders rather than directly to the disc. If you want to burn directly to the disc, then just fill out the top portion of the page, including the Volume Label, insert a disc and click burn. You may want to set the preferences to point the temporary area to another disk where there is ample space. BluRay disks require a lot of space to build.
In my case, I burn folders so that if there are problems during the rendering process, I have not wasted a disc. I use ImgBurn , a free program, to write my folders to the BluRay disc once I know it’s ok, and if I want multiple copies, I can burn another copy from the same folders after I have tested the first copy. Here’s a guide to burning folders to a BluRay disc.
Enjoy,
ww
