
Recently I’ve gone round and round with my Aurora R2 system.
I finally chose to upgrade the system with new Motherboard, processor and memory, but I get ahead of myself. Let’s start at the beginning.
You may remember this system from previous tales on this blog.
As you can see from the image of the system on that page, the system had 8GB of memory that was all working. Somewhere along the way it developed an issue where it would only use 1/2 of the memory.
Update: See note at the bottom about performance of Intel Graphics on Haswell.
Update: System is now stable. I moved back to a previous version of the Nvidia GTX drivers for the 560ti.
Where’s the Rest of the Memory?

As you can see, it now reports that only 4GB are usable out of the 8GB. At this point, I had swapped out the graphics card for a more modern GTX 560ti.

I’m not sure whether this swap caused the problem or not. After struggling for a whole day, with forum posts going on 3 different help sites – including an official DELL/ Alienware site, I gave up.
No amount of tweaks, swaps of DIMMs, testing DIMMs in other machines, searching for BIOS settings, or looking for jumpers on the motherboard yielded any fruit. The BIOS clearly saw all the DIMMs and refused to allow all the memory to be used. There is no setting for this. If you remove 2 of the 4 2GB DIMMs, you get 2GB usable out of 4GB of memory. Windows shows the memory as Hardware Reserved. Linux – booted from a Live DVD – showed 4GB of memory available.
Giving Up
At this point, I gave up. It seems to me that the BIOS has a DELL / Alienware hack that noticed a change in the system and maliciously reduced the memory to 1/2 of the original. Certainly the behavior is not distinguishable from that case.
On a trip the next day to Portland, OR, which I had planned anyway, I stopped by Fry’s in Wilsonville, OR and purchased a new Motherboard, Processor and Memory. These are different from the upgrades that I had considered before in this post.
Based on availability and price I chose the following upgrades:
- ASUS B85M-E/CSM microATX motherboard.
- Intel Core i-7 4770 Haswell processor
- Kingston HyperX 16GB DDR3 1600 (2x8GB)
Upgrade Mechanical Issues
MB CPU Power Connection
The Alienware MB used an 8 pin CPU power connector. The new ASUS MB uses a 4 pin connector. Fortunately, the Alienware CPU power connector has the standard break apart design.

Mounting the Alienware Cooling.
The Alienware Branded Cooling solution has a plastic backplate that is bolted to the case rather than bolted to the motheboard. This means that if you replace the motherboard with another type, and the processor is not in exactly the same place, the backplate will not line up correctly.

The solution is to unbolt the plate from the case, screw it to the MB temporarily and use double stick tape to hold it when the MB is in place. Since the screws holding it to the MB must be removed to bolt the cooler onto the MB, the plate must not shift.

Thin Double stick poster tape actually was placed on the case to assure the plate would not move. Here is the case raised area under the plate.

After all this preperation, the Alienware Cooling solution worked quite well with the new MB.
SATA Cable Issues.
The original Alienware MB used SATA connectors that faced horizontally at the edge of the MB. The new MB had vertical connectors on the face of the MB. This caused a clearance problem for the GPU card. The SATA cable for the BluRay drive interfered with the GPU. The solution was to use a Right Angle end SATA cable for that connection. This allowed the GPU to be inserted without problems.
Sound Card Issue.
The original sound card was a Creative Sound Blaster Xtreme PCI-e card. It of course used the short PCI-e board connector. The matching slot on the new MB is a long connector that provides for an AMD Crossfire GPU configuration. The board seemed to work fine when inserted into this longer connector. However, the ASUS MB sound solution by RealTek is probably much better, since it’s a 5 year newer design, so the old sound card was removed.
AlienFX Issue.
The software for the AlienFX was not present, or I could not easily find it, on the restore disks that came with the system. After some work on the DELL site, I found a “AlienFX Control Center” called: App_DT_AWCC_W7_X04_Setup_TD4C0_ZPE. This software would not install however, with a message of: “This installation package is not compatible with this system”. Not clear whether it will not install on Win 7, SP1, or whether it does not like seeing a non-DELL motherboard.
The AlienFX lighting does work and usually turns on after the boot. The settings are stored in Flash apparently. To diagnose the instabilities mentioned below have lead me to unplug the device to see if the system is more stable without the device.
Instabilities
The system is not entirely stable at this point.
Every few minutes, the system hangs and the mouse freezes for 10-30 seconds. There are frequent NVIDIA driver resets, and the system occasionally crashes. I’ve unplugged the USB cable for the AlienFX board and will use the on-board graphics if that doesn’t help the problem. The recent NVIDIA graphics drivers have had problems on my other machine with frequent – 2-3 times a day – resets / restarts but no crashes.
I think at this point that the problem is not with the new MB, processor or memory, but with some peripheral or driver. The work of isolating the problem continues and I’m glad that this is not my primary machine.
Update: 8/3/2013
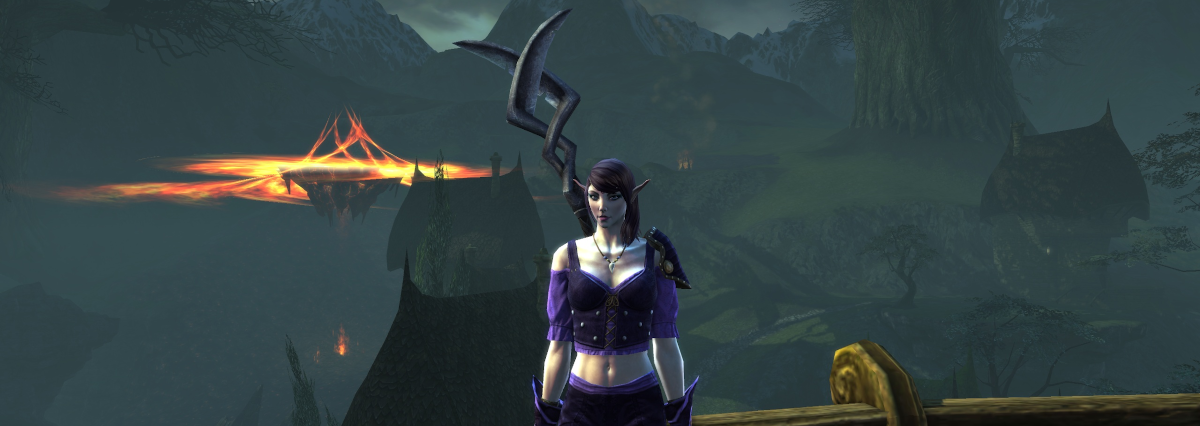
I just removed the Nvidia 560ti graphics card to test whether the Nvidia graphics driver is the problem with the instability. After going to the Intel site to get the latest drivers for the Core i7-4770 4600 GPU drivers, and clicking the Intel optimizer for the graphics to 3D optimized, I gave Tera a try. This is the game I’ve been playing recently.
I have just one comment about Intel Haswell Graphics: Nvidia has nothing to worry about from Intel and their graphics. This is the almost hottest graphics for the brand new high end chip that they just brought out and it SUCKS compared with two generations ago of Nvidia cards. GTX 560ti vs Haswell 4600 graphics. I had to reduce the Tera graphics options to level 1 to get a decent frame rate with the 4600. Nvidia was running on level 5 – the max. On this setting, level 1 looks practically Cell Shaded compared with practically photo-realistic with level 5 on Nvidia.
I can edit video on the Haswell graphics configuration, so I’ll leave the Nvidia card out for a while and see if the machine is stable. But I won’t be playing the Tera game here. The main machine has the GTX 760 card which is just great and that system is stable.
If you plan to do any game playing, get yourself an Nvidia card, even a low end one. It’s much much much better than built in Intel graphics.
Update: 8/4/2013
By moving back to Nvidia GTX drivers version 301.42 from May 2012, the system is completely stable. And of course it also runs Tera on the highest quality at full frame rate.
-ww
